CyberLink PowerDirector Help
This page outlines some of the Latest Features and UI and behavior changes you should know about.
Updates to 19.6 (GM6)
The following are some of the new features in the latest version of CyberLink PowerDirector. If you just updated from PowerDirector 18 or below, you should also see Updating From 18 or Below to 19.
Auto Object Selection Tool
When importing images into the Brush Mask Designer, you can use the auto object selection tool* to automatically select a primary object in the image to instantly create the mask.
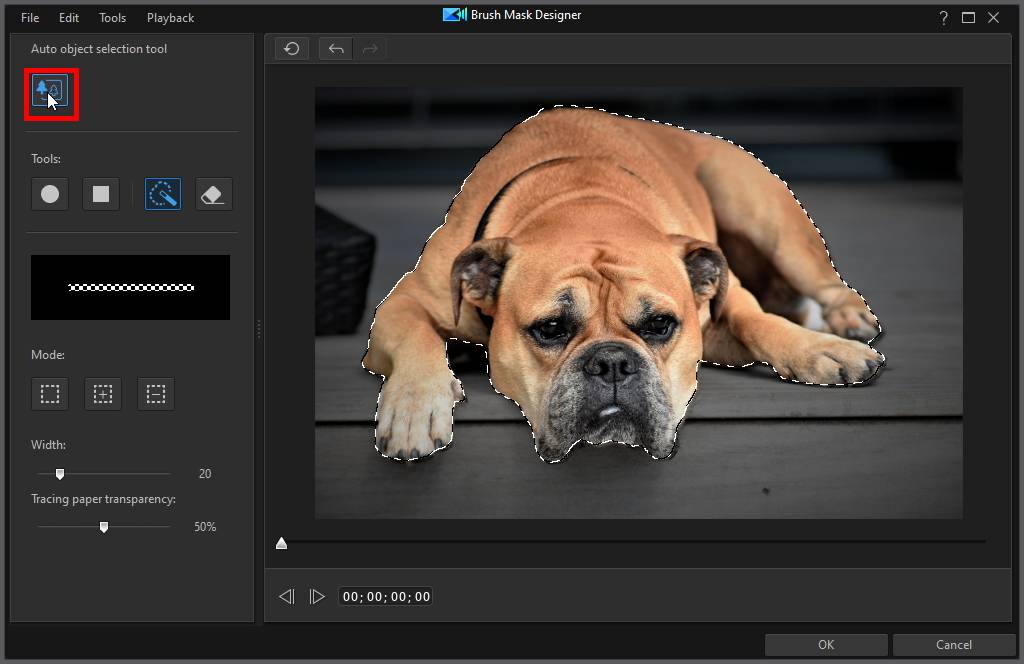
See Using the Auto Object Selection Tool to Add an Image Mask for more detailed information.
Note: * this feature is currently only available in the subscription version of CyberLink PowerDirector, and requires Windows 10 and a CPU that supports the AVX2 instruction set. See this FAQ for detailed requirement information. |
Smart Brush in Brush Mask Designer
A smart brush* has been added to the Brush Mask Designer, which makes it easier to select only the pixels you want.
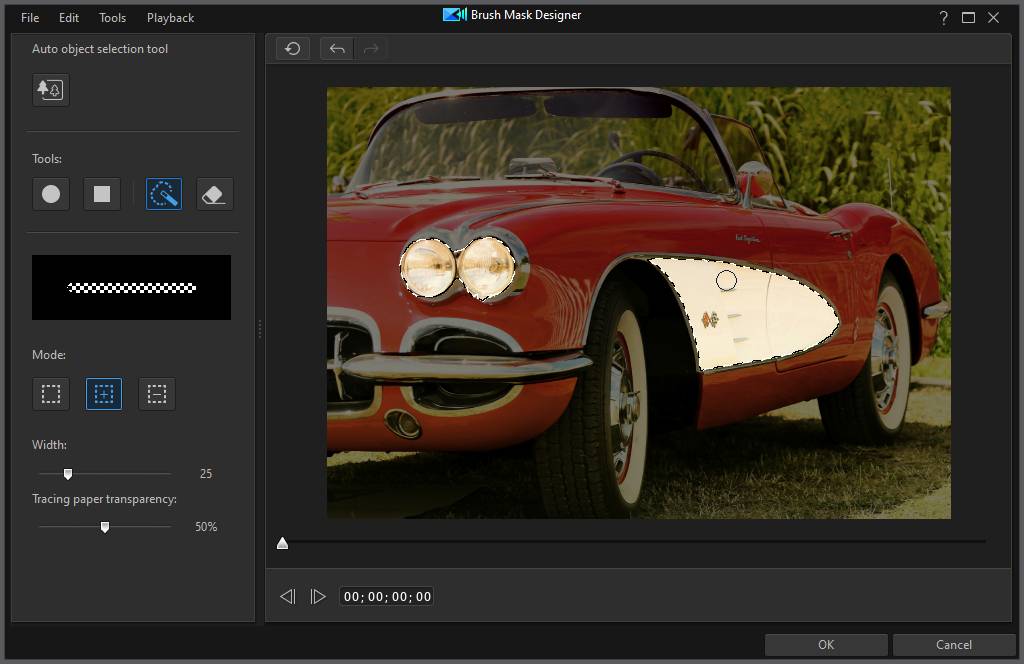
Check out Manually Creating a Mask Using the Available Tools for more details on this new brush.
Note: * this feature is currently only available in the subscription version of CyberLink PowerDirector, and requires Windows 10 and a CPU that supports the AVX2 instruction set. See this FAQ for detailed requirement information. |
Updating From 18 or Below to 19
The following are the main UI and behavior changes in PowerDirector 19 after updating from version 18 or below.
Access to Modules Moved
The Edit button has been removed, and access to the Capture and Create Disc modules have moved.
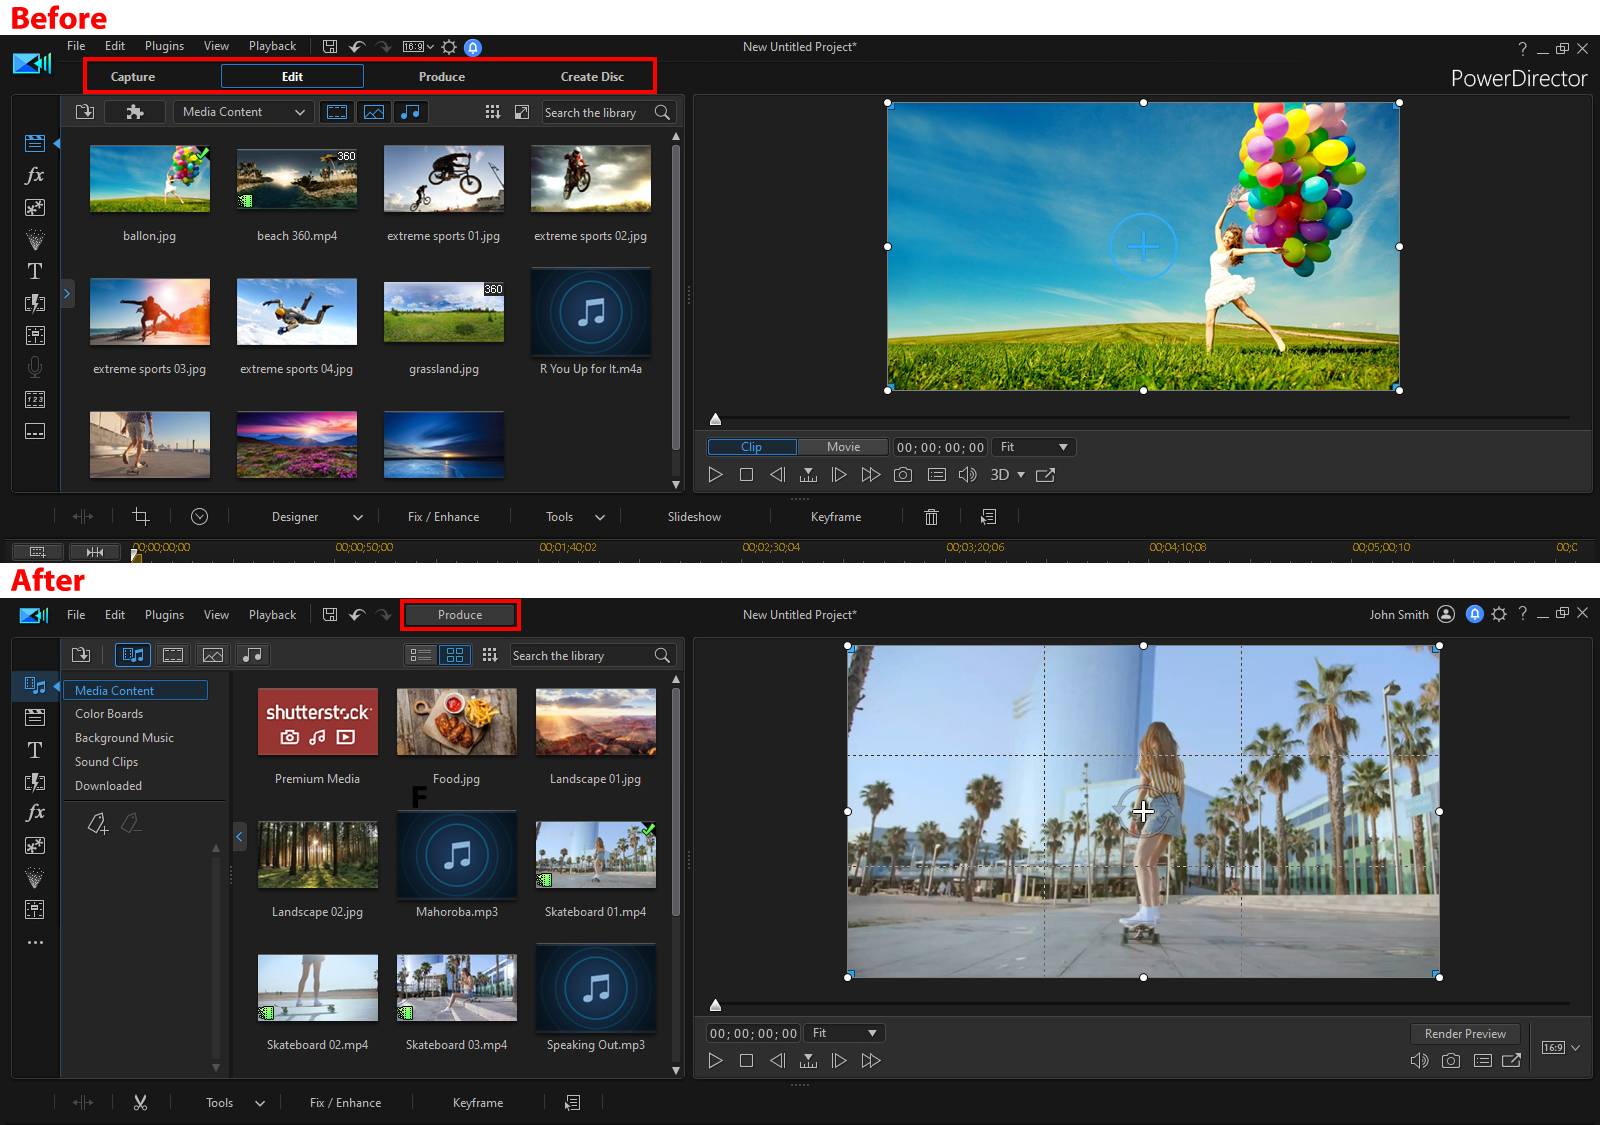
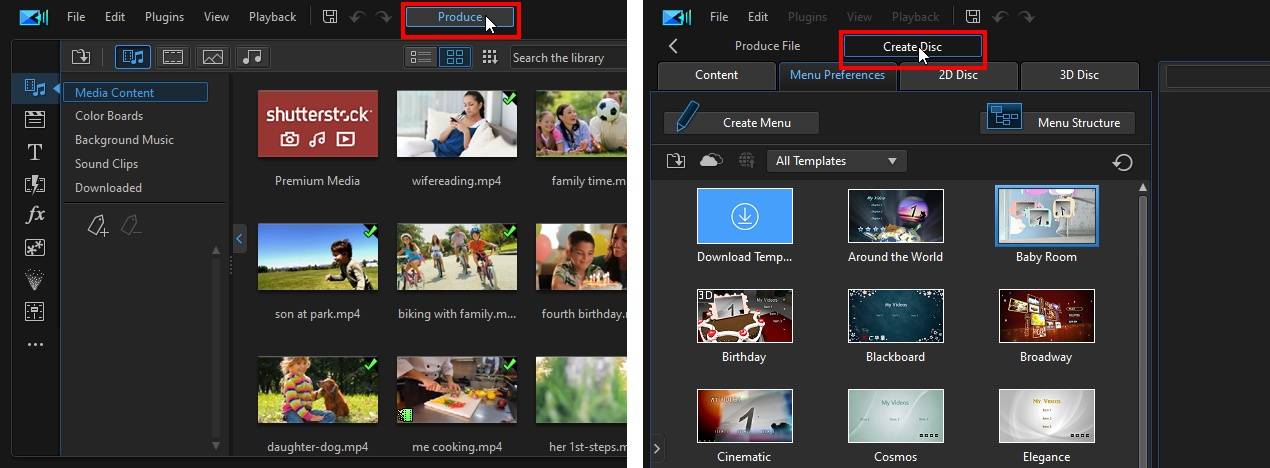
Access to Create Disc Module Moved
Access to the Create Disc module has moved to the Produce module. Click the Produce button and then click on the Create Disc tab to access.
To exit the Produce module and return to the edit module, click the  near the top left corner of the window.
Access to Capture Module Moved
Access to the Capture module has moved to the menu.
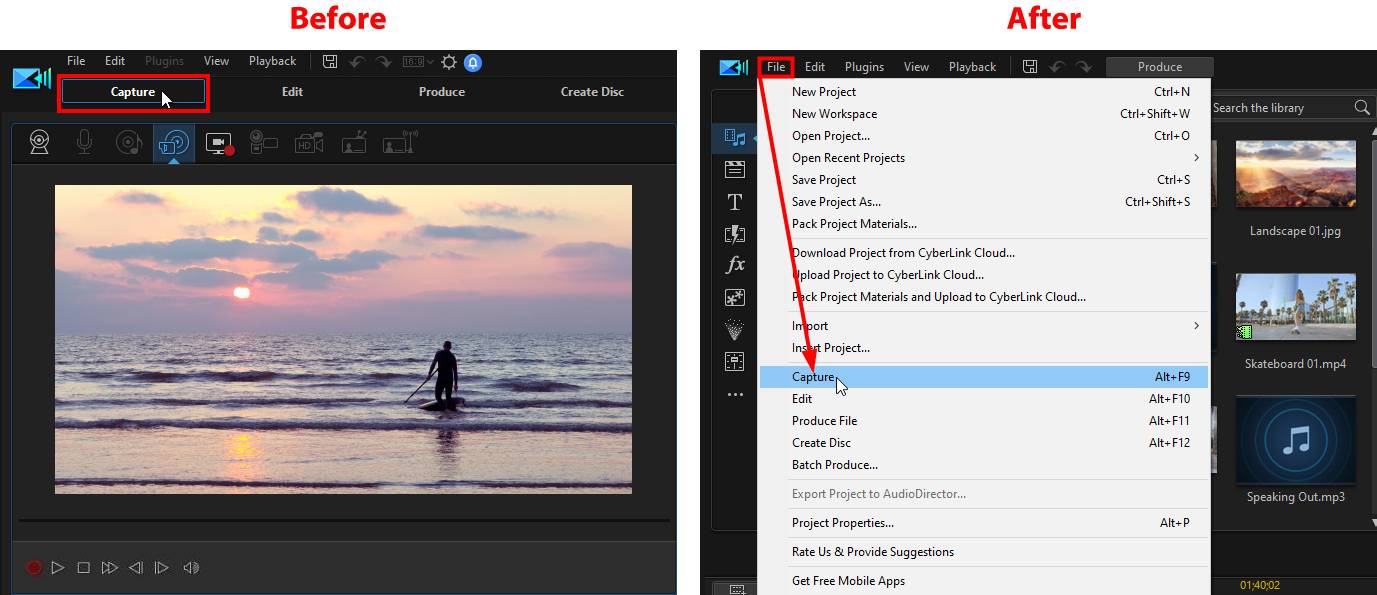
To exit the Capture module and return to the edit module, click the X near the top right corner of the window.
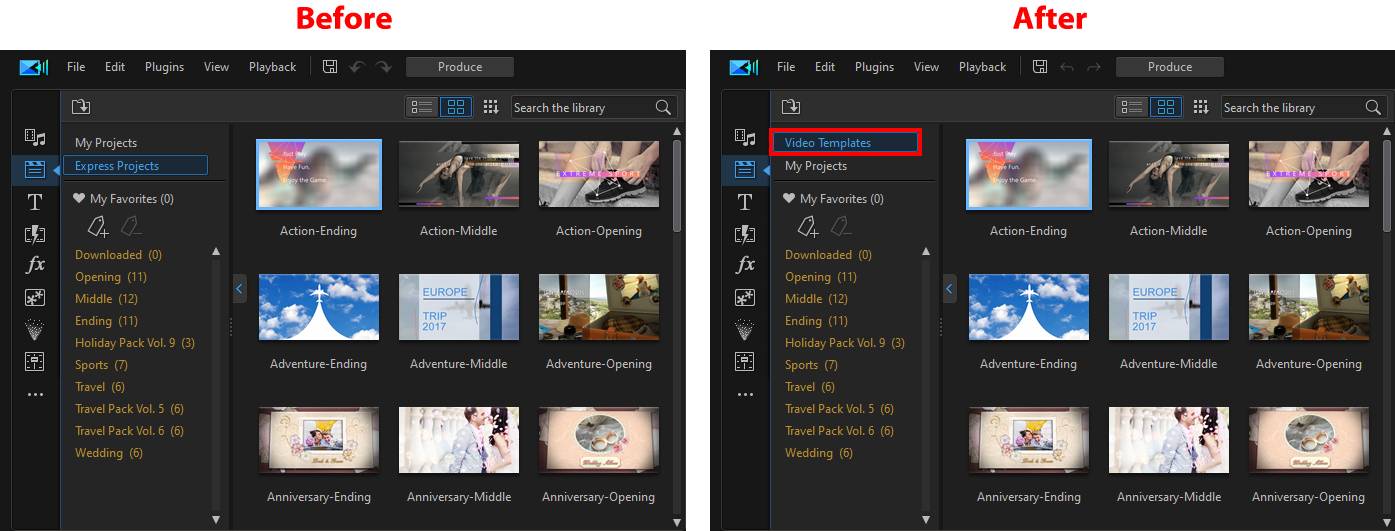
Express Projects Renamed as Video Templates
Express projects have been renamed as video templates and are now at the top of the project room. See Using a Video Template for more information on video templates.
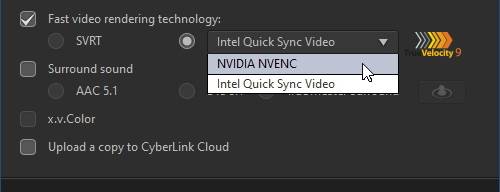
GPU Switching
When using hardware encoding to produce videos on computers that have more than one GPU, you can now select the preferred GPU from a drop-down. This is ideal for users that are running CyberLink PowerDirector on laptops that have both an integrated and discrete GPU.
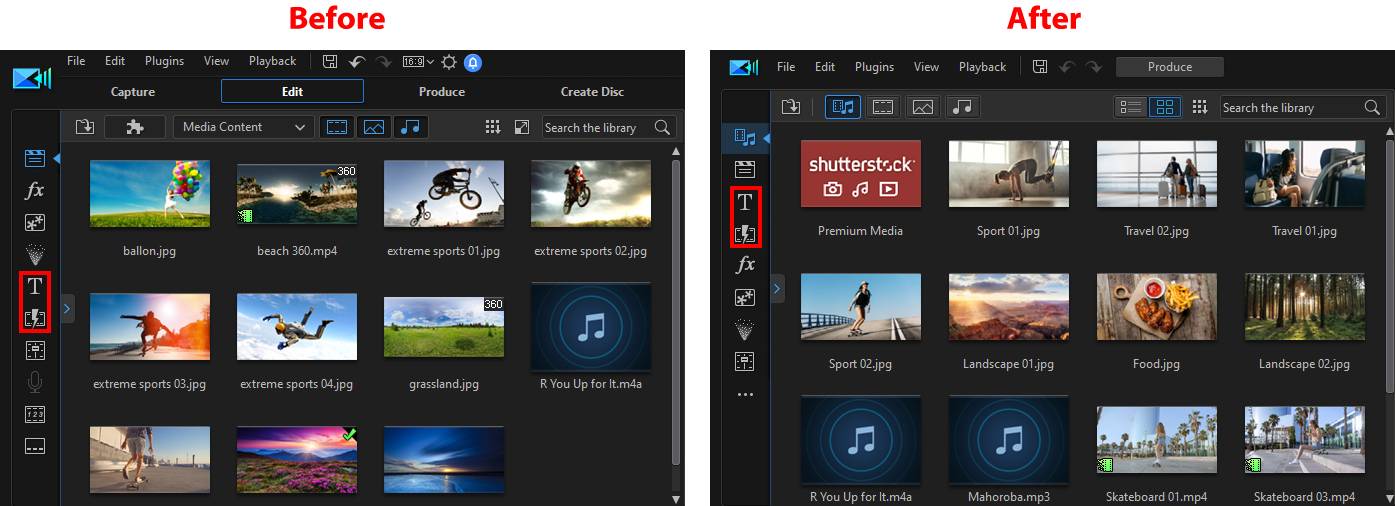
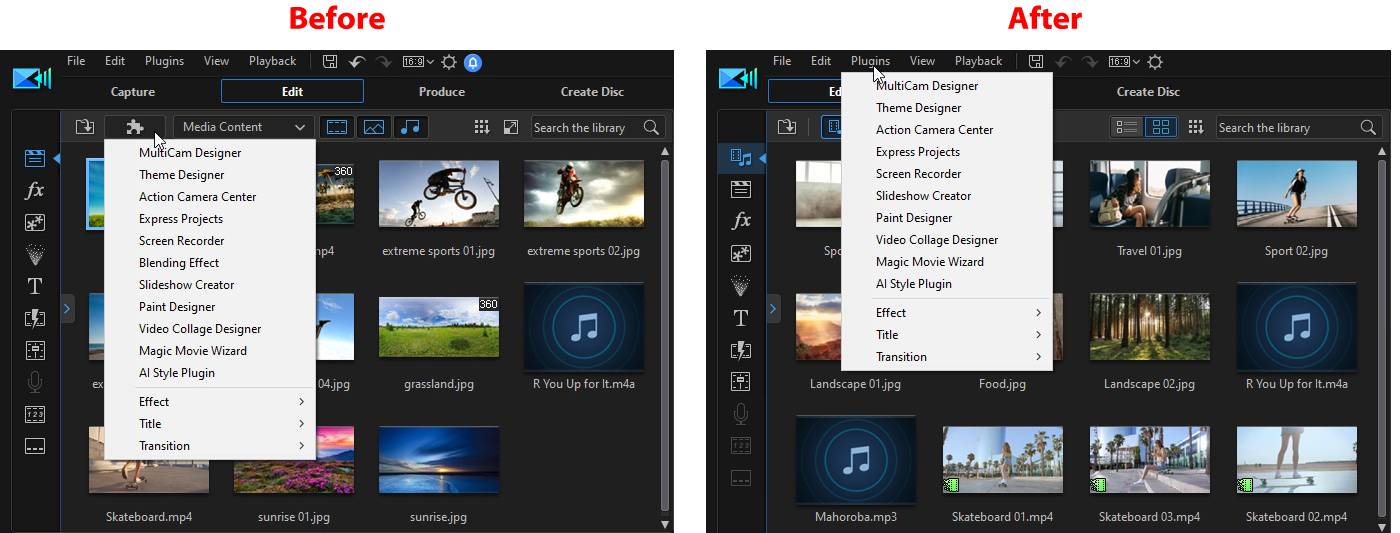
Improved Media Library
The media library has been improved to be less busy, so you can find and sort your media more easily.
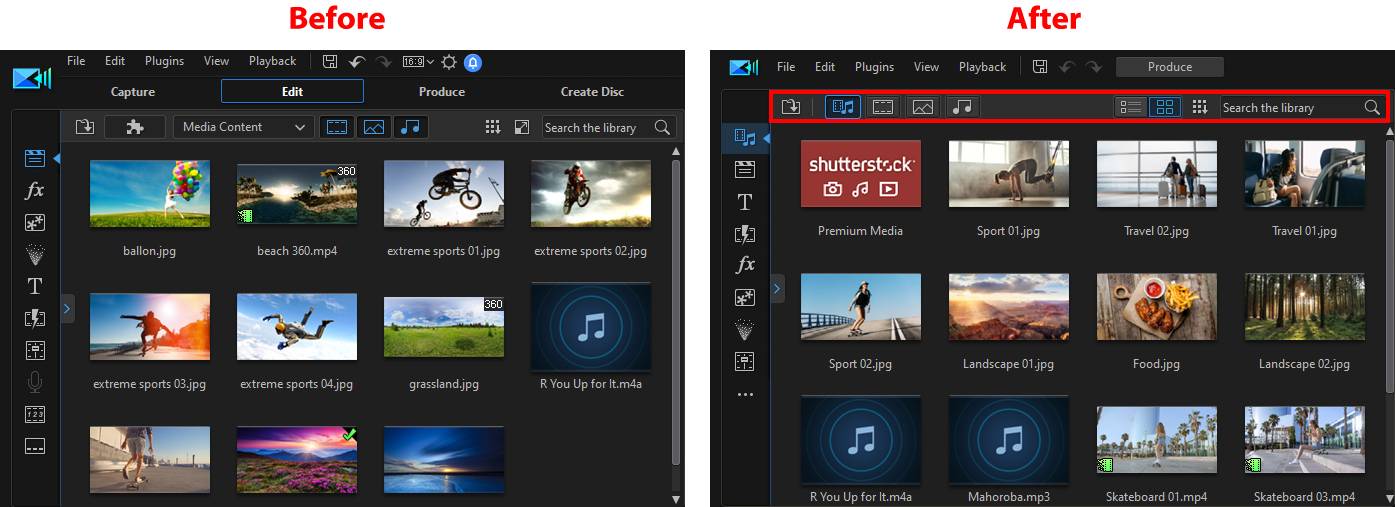
Color boards, background music, and sound clips can still be accessed in explorer view, which is opened by default.

Note: background images must now be manually imported by going to the following installed folder: |
The title and transition rooms have been moved up in the rooms list panel for quicker access.
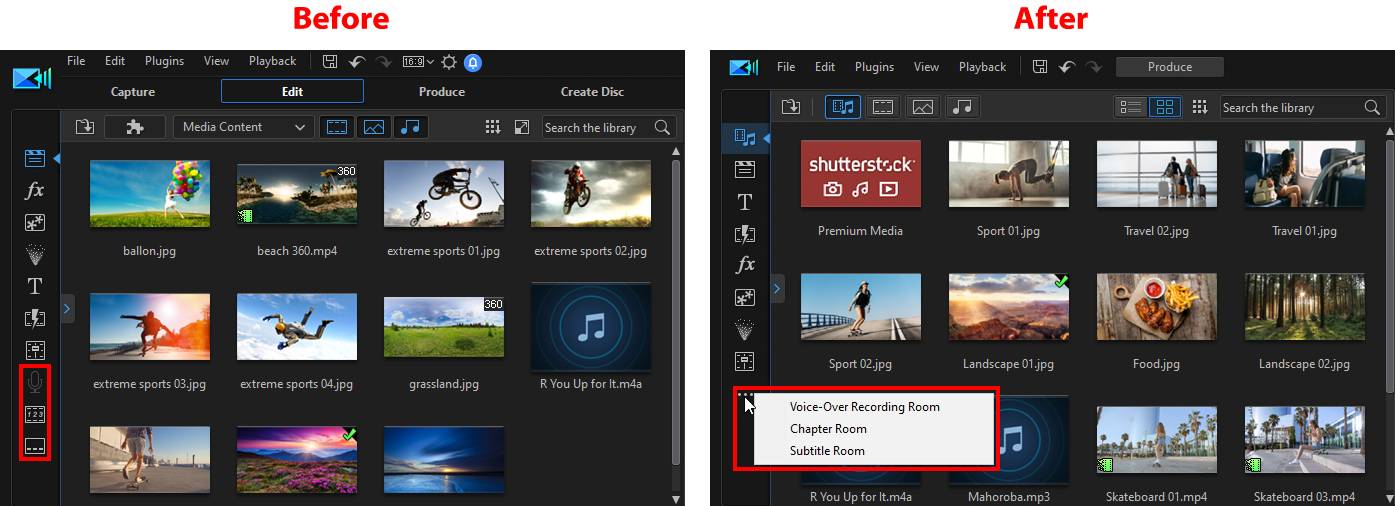
The voice-over recording, chapter, and subtitle rooms are now hidden by default. You'll need to click the  button first to enter one of these rooms.
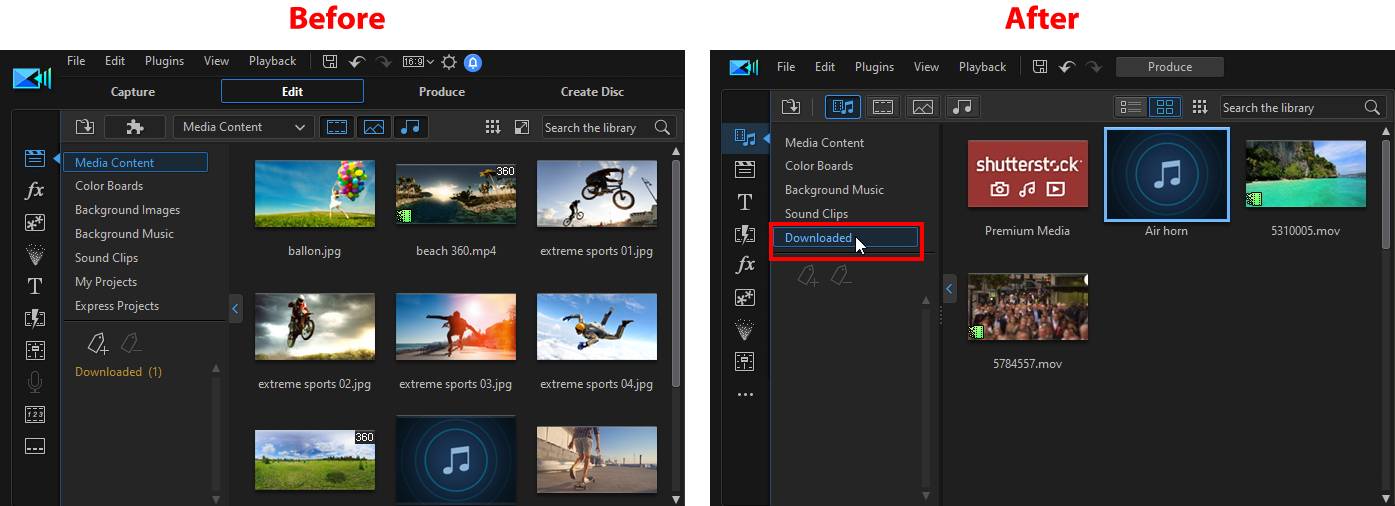
All the media clips you download from Shutterstock, and music downloaded via the CyberLink Application Manager (instead of just media downloaded from DirectorZone/CyberLink Cloud), can be found more quickly by clicking on the Downloaded folder in the media library.
Installed effect packs can now be found more easily within CyberLink PowerDirector by looking for the new effect/template indicators.

The Shutterstock Premium Media button can be hidden to create more space in the media library.
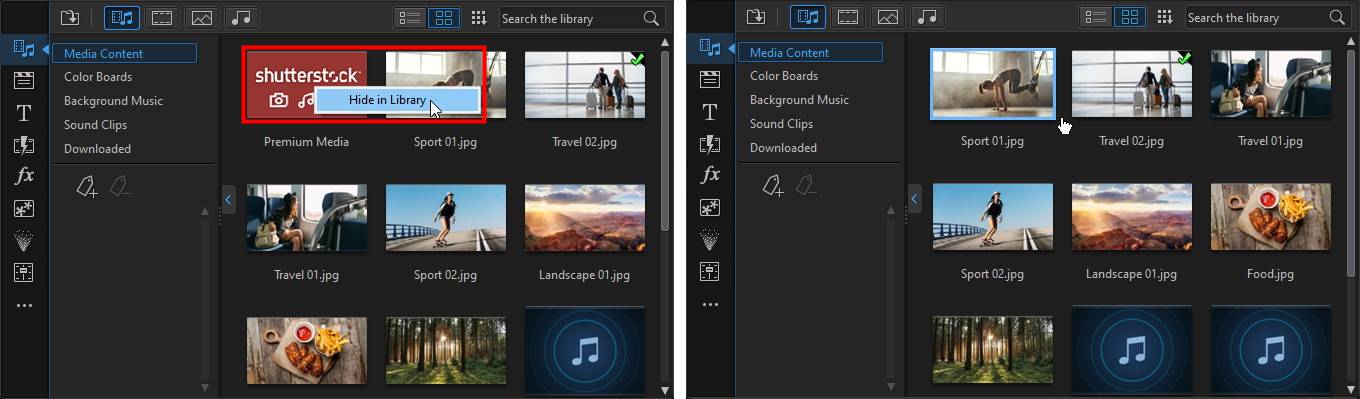
The Shutterstock button will again be displayed the next time you launch CyberLink PowerDirector.
Access to the PowerDirector plugins has moved to the menu.
New Project Room
You can now more easily find all of your previously created projects, and your video templates, in the new Project Room.
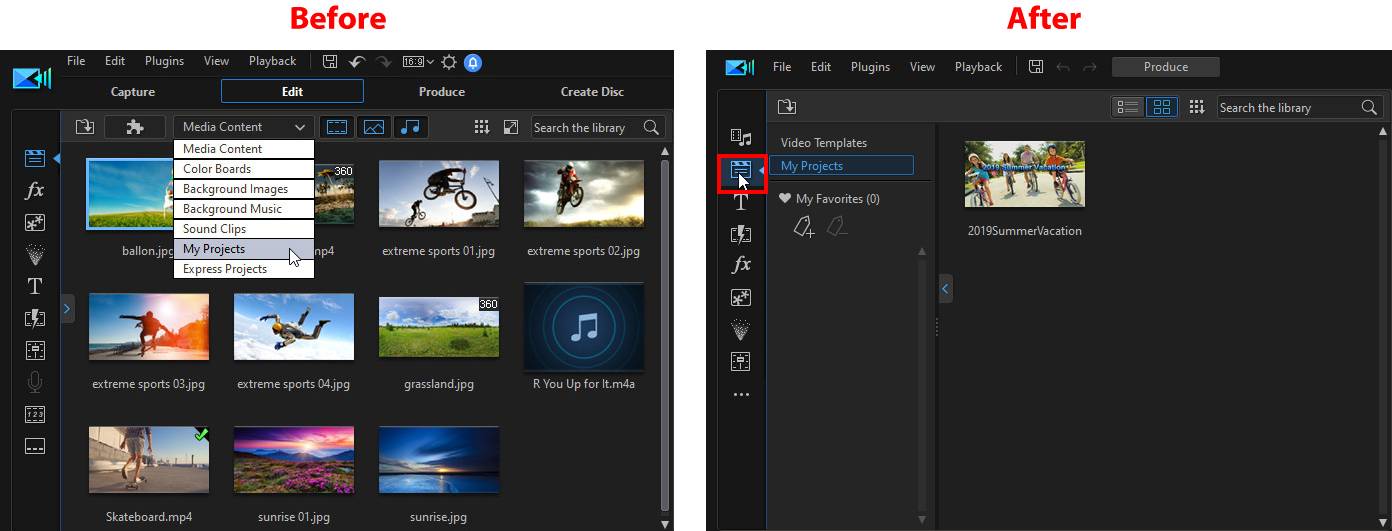
See Project Room for more information.
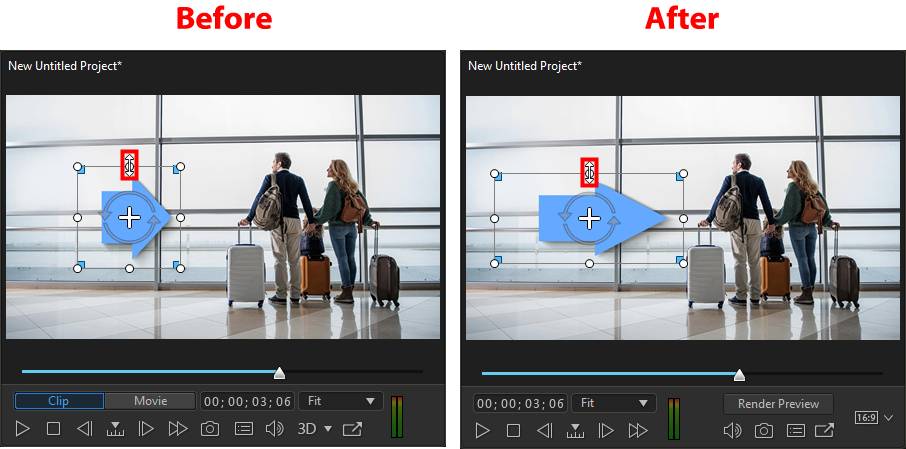
Enhanced Project Preview Window
You can now set your project's aspect ratio and render a preview of your current project right in the project preview window.
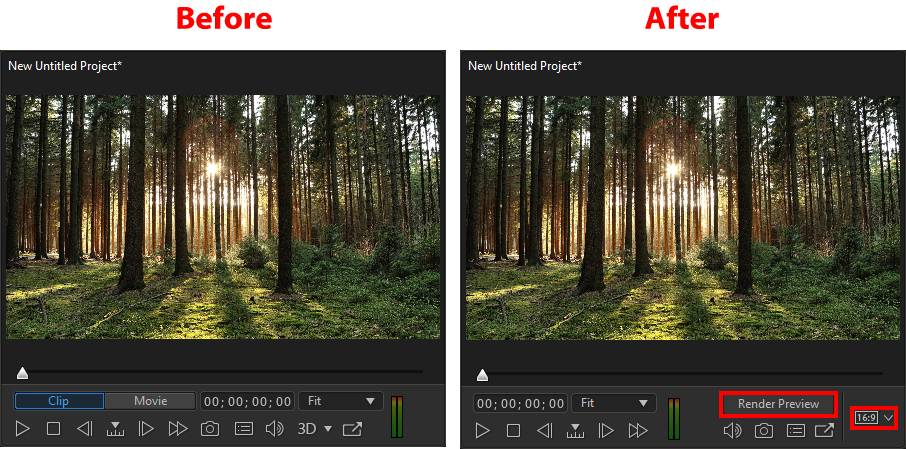
Also note that the clip/movie mode buttons have been removed, but you can still access the modes using the keyboard hotkeys Page Up (clip mode) and Page Down (movie mode). See Project Preview Window for more information. Lastly, the enabling 3D preview has been moved to the display options.
Turn Off Snap to in Project Preview Window/Designers
Hold down the Alt key on your keyboard when moving or resizing clips in the project preview window, or any of the designer windows, to temporarily turn off the snap to feature for smoother clip movement and placement.
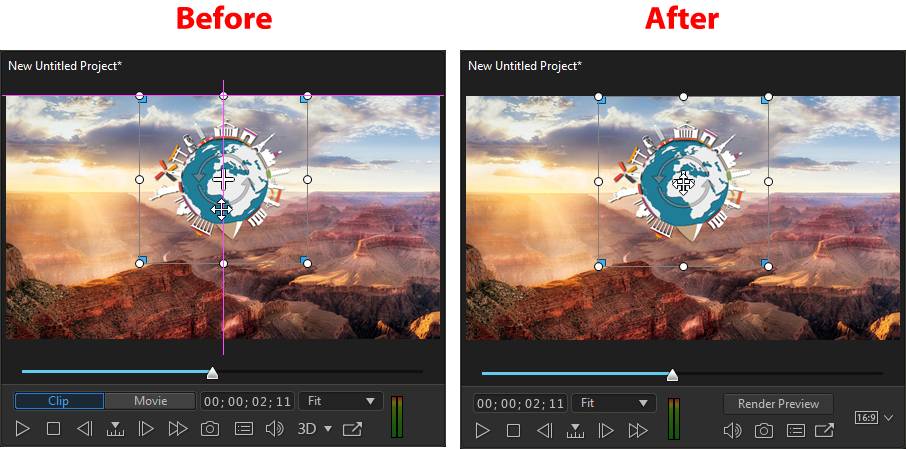
More Flexibility When Resizing Clips in Project Preview Window/PiP Designer
When resizing media clips in the project window and the PiP Designer, selecting one of the four resize nodes on the sides of the media clip will allow you to change the clip's aspect ratio.
See Resizing Media Clips for more detailed information.
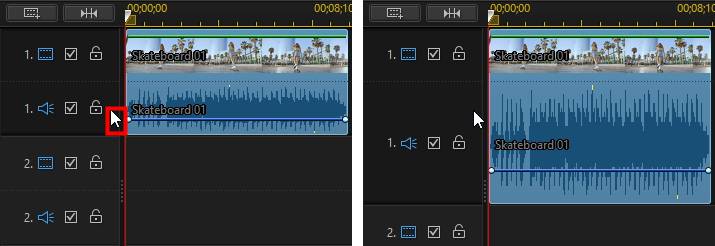
New In-Track Timeline Enhancements - Adjusting Track Height
You can now double click on a track's left sidebar to quickly adjust the track height.
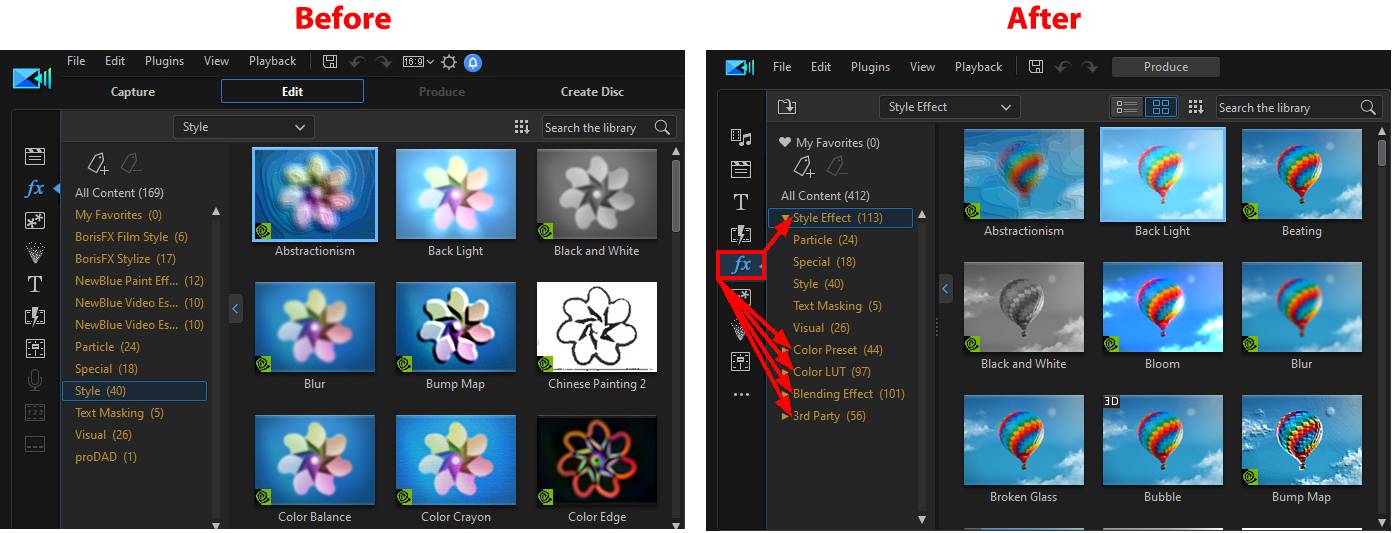
All Effects Centralized in the Effects Room
All of the effects in CyberLink PowerDirector (style effects, color presets, color look-up tables, blending effects, third party effects) can now be found in the Effects room.
Enhanced Audio Mixing Room
The audio mixing room has been enhanced to allow for more advanced project mixing options.
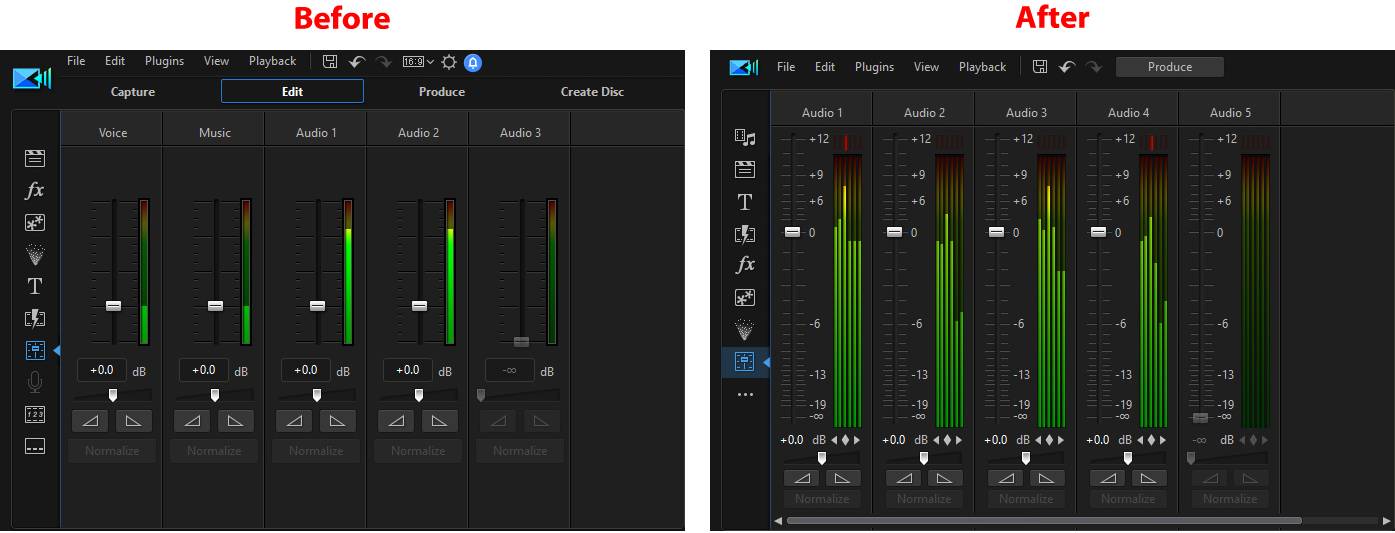
See Mixing Audio in the Audio Mixing Room for the full details.
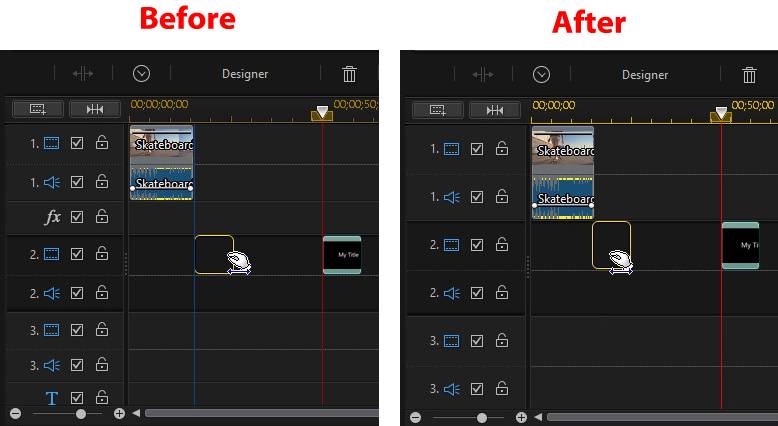
Access to PiP/Mask Designer Changed
When you select a video or image on the timeline, the PiP Designer and Mask Designer can now be accessed by clicking the Tools button.
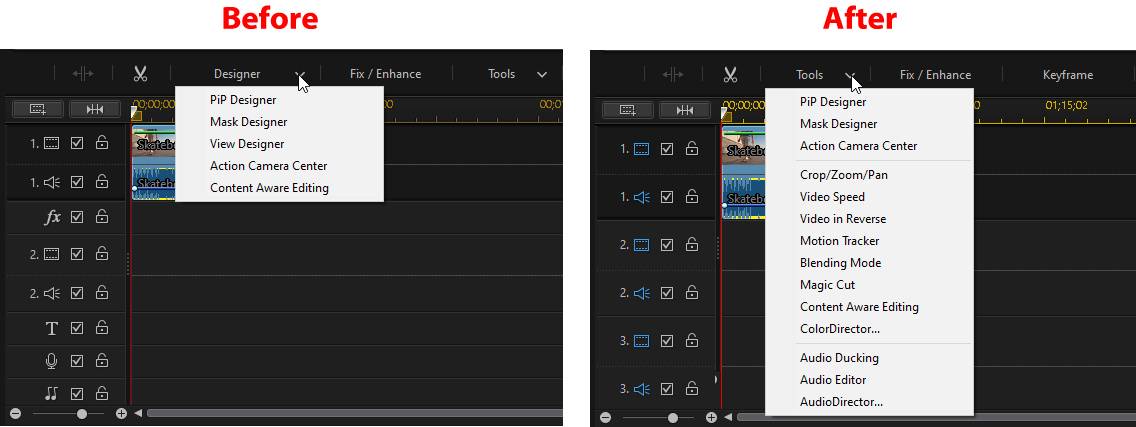
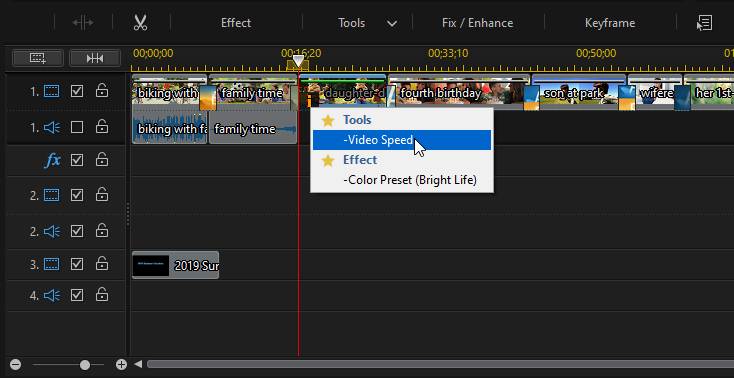
Easier Access to Power Tools
There is now one less step when wanting to access any of the Power Tools, such as crop video, change video speed, reverse audio, etc. Just click the Tools button above the timeline for easier access to these and other features.
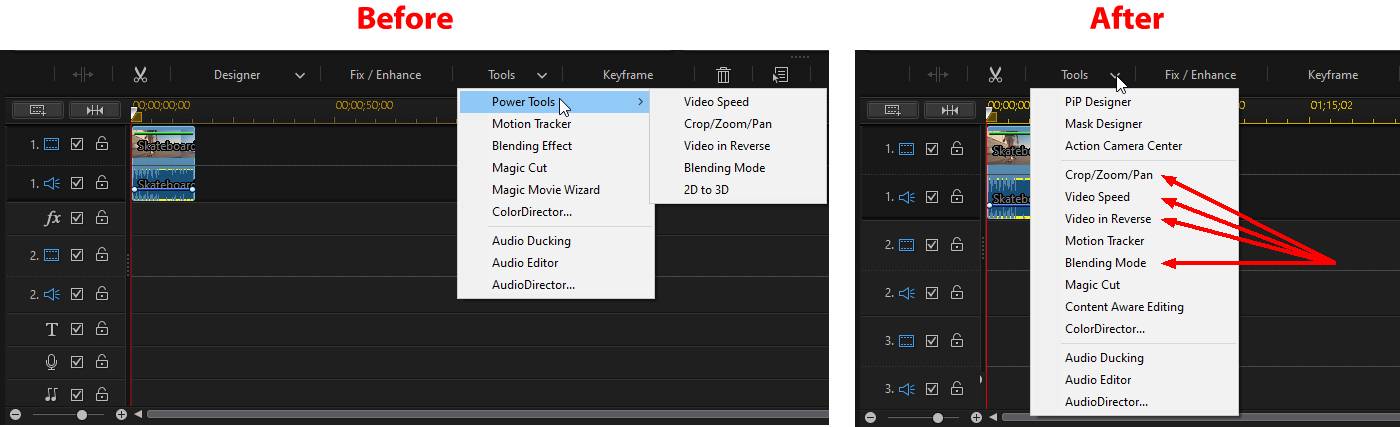
The 2D to 3D feature can now be accessed by clicking the  button above the timeline, and then selecting Set Clip Attributes > Convert 2D to 3D.
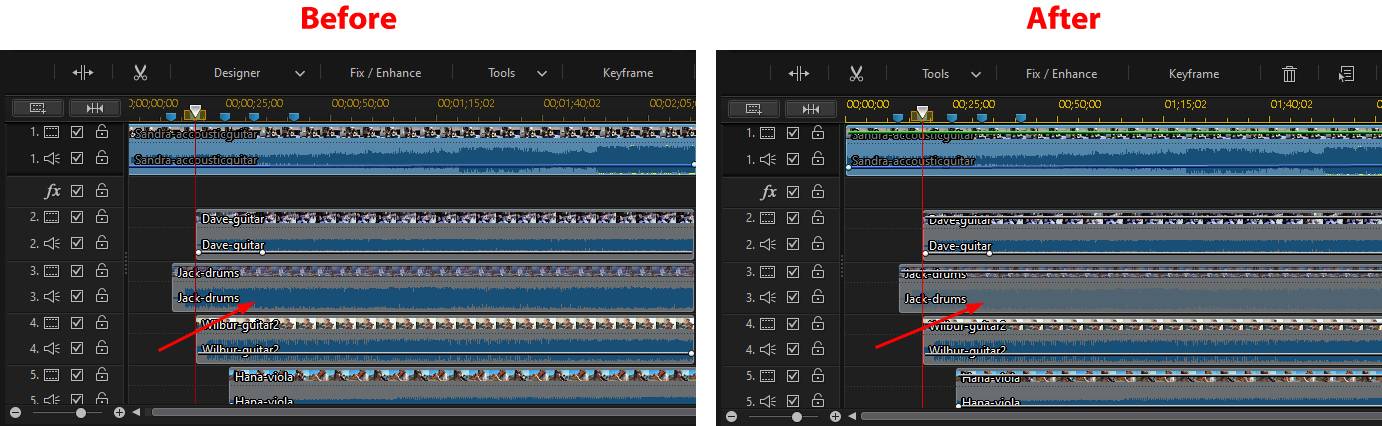
Simpler Timeline Track Layout
Less track types for a cleaner timeline layout and simpler editing experience.
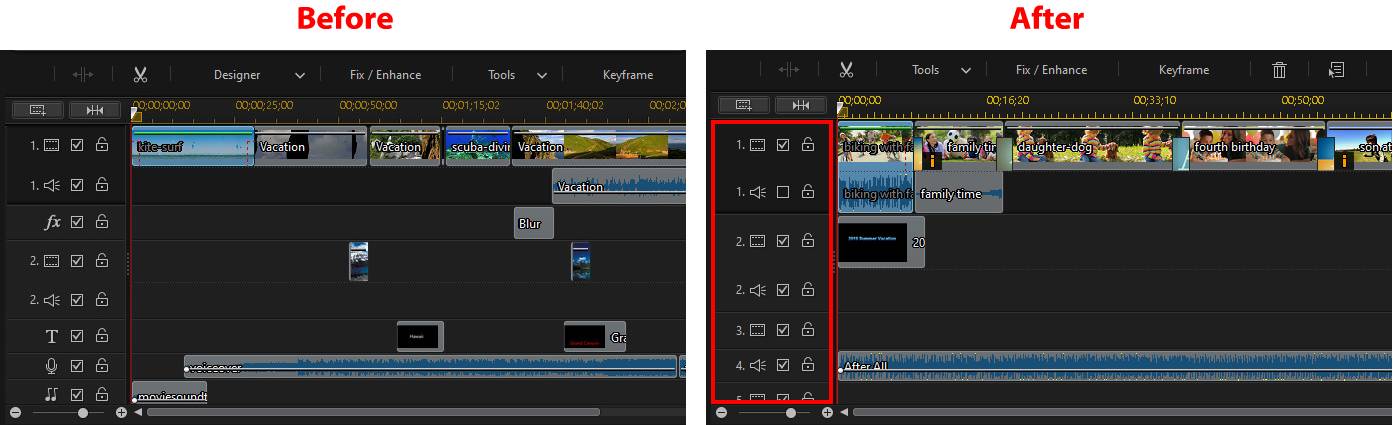
If you'd like to add the effects track back, you can do so in the Track Manager.
Note: if you open PowerDirector projects created in older versions of the program, PowerDirector will revert back to the original timeline track layout while you are editing that project. |
New In-Track Timeline Features and Enhancements
The following in-track features and enhancements have been added to make editing your projects in the timeline easier.
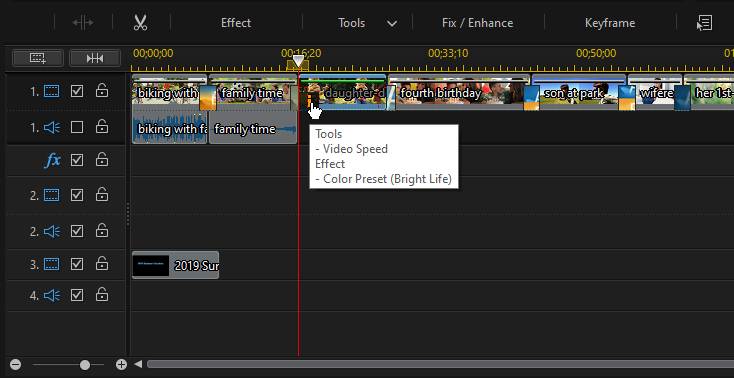
Quicker Access to Applied Effects
It is now easier to make further edits on applied effects. Just click on the "i" icon and then select the applied effect in the info window to open it in the specific editor.
Easier to Find Muted Timeline Clips
Muted video and audio clips on the timeline are now easier to locate in your edits.
Turn Off Snap to in Timeline
Hold down the Alt key on your keyboard when moving or resizing clips on the timeline to temporarily turn off the snap to feature for smoother clip movement and placement.
Duplicating Clips
Click on any clip in the timeline and then, while holding down the D key on the keyboard, drag your mouse to another position to duplicate the clip.

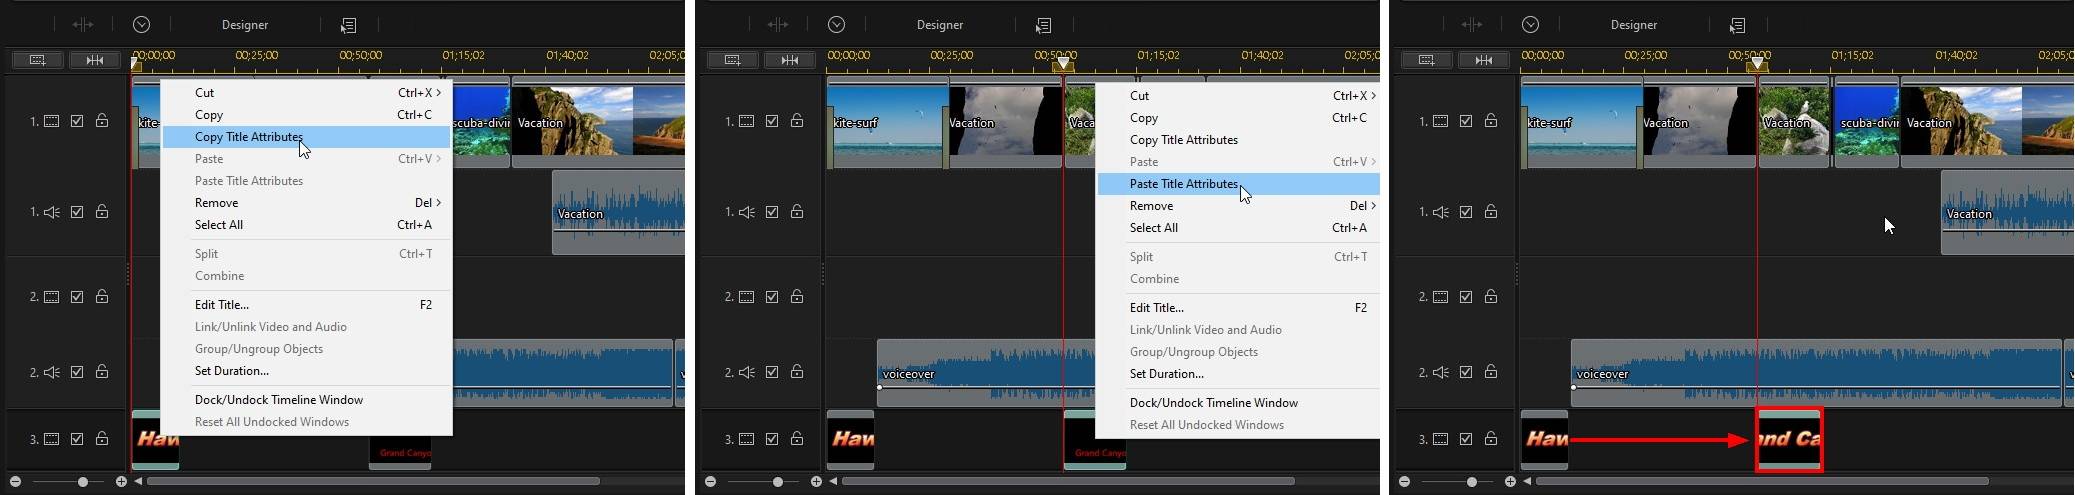
Copying Title Attributes
Just like with media clips and their keyframe attributes, you can now copy the text and keyframe attributes of a title effect template and then paste them onto another title effect in the timeline.
Adding Timeline Markers at Slider Position
Timeline markers are now added at the timeline slider's current position, making it a lot easier to set its precise location during video editing.
