CyberLink PowerDirector Help
When you select Full Mode at startup, you enter the timeline editing mode where all of CyberLink PowerDirector's features are available and you can view your entire project based on running time. This view is useful if you want to insert media, effects, subtitles, etc. at a specific moment or frame in the production. The timeline also provides a view of all the tracks, media, and other content (chapter markers, subtitle markers) that are displayed in the timeline.
Note: you can click and drag the timeline slider to preview the audio waveform of a video or audio clip on the timeline with audio scrubbing*. * optional feature in CyberLink PowerDirector. Check the version table on our web site for detailed versioning information. |
Timeline Order
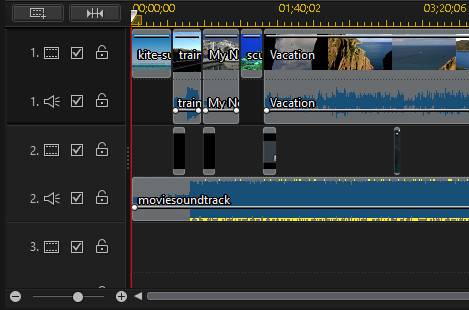
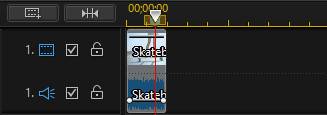
By default, the main video track in the timeline where you place your media is track 1 and is the top track in the timeline. All the overlay effects and PiP videos/images are then placed below this main track in the timeline.
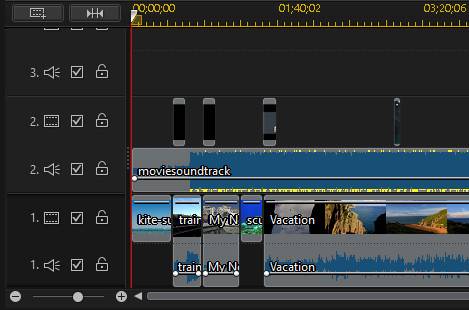
However, you can reverse the timeline order in Editing preferences, so that the main video track (track 1) is at the bottom of the timeline, and you then add all overlay effects and PiP images/videos on the higher tracks in the timeline.
Timeline Tracks
The timeline contains the following tracks:
Track |
Description |
|
Video tracks contain your project's media clips (video clips and images) and effects (PiP objects, particle effects, title effects, etc.) on the timeline. By default, there are three video tracks in the timeline, but you can have up to 100 video tracks by adding more in the Track Manager. Each video track in the timeline may have an associated audio track for the video clip's audio. |
|
Audio tracks contain the audio in your project. The audio may be the audio portion of a video clip on the video track, or a separate audio track for music clips or other audio. By default there are three audio tracks linked with a video track. You can have up to 100 audio tracks by adding more in the Track Manager. |
|
The effect track contains any video style effects that you want to apply to your final video. Video style effects in the effect track are applied to all the video tracks that are positioned above it in the timeline. You can enable the effect track in the Track Manager. |
|
The chapter track contains all of the chapter markers in your current video production. This track displays when you are in the Chapter Room. Right-click on the timeline and then select Show Chapter Track if you always want this track to display in the timeline. |
|
The subtitle track contains all of the subtitle markers in your current video production. This track displays when you are in the Subtitle Room. Right-click on the timeline and then select Show Subtitle Track if you always want this track to display in the timeline. |
|
The SVRT track displays the Intelligent SVRT information for your current project. See Utilizing Intelligent SVRT for more information. Right-click on the timeline and then select Show SVRT Track if you always want this track to display in the timeline. |
|
The clip marker track displays all of the clip markers on your media clips. Clip markers are automatically added when using Music Beat Detection or the Screen Recorder. Or they can be added manually on each individual media clip on the timeline. Right-click on the timeline and then select Show Clip Marker Track if you always want this track to display in the timeline. |


Timeline Behavior
The CyberLink PowerDirector timeline has several behavior features that make it easy to manage media on the timeline.
On the timeline you can:
•place media clips at any position on a video track. If no media is placed before a media clip on the timeline, your video production displays a black screen until the timeline position of your media clip is reached.
•media clips will snap to other clips on the timeline for easy placement in your production. If want to move the clips more freely on the timeline, you can disable snap to clips in Editing Preferences.
•hold down the Ctrl key on the keyboard and select multiple media clips on the timeline.
•click and drag the mouse to select multiple media clips on the timeline.
•right-click on select media in the timeline and select Group Objects. Doing this allows you to move all the selected media clips as a group. Select Ungroup Objects to once again allow for individual media clip movement.
Note: you cannot include transitions in grouped objects. |
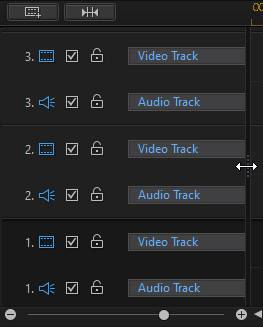
Timeline Ruler
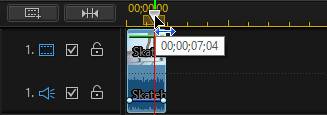
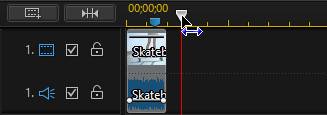
You can resize the timeline ruler for a more expanded or condensed view of your production. To resize the ruler, click on the ruler and drag it left or right.
Expanding the ruler is especially handy when aligning clips and effects, while condensing it gives you a global overview of your entire production.
Click  to auto fit your current project in the timeline area if you want to view the entire video in the editing workspace. You can also right-click on the timeline ruler and select View Entire Video to do this. Or select Zoom In or Zoom Out to change the view to your required size.
Use the timeline ruler slider  located in the bottom left corner to manually resize the timeline.
Timeline Markers
You can add timeline markers* to the timeline ruler for more precise media placement on the timeline. Once added, media clips snap to the timeline markers, allowing your media to appear in your video production at the exact moment you want it.
Note: * optional feature in CyberLink PowerDirector. Check the version table on our web site for detailed versioning information. |
Adding Timeline Markers
To add a timeline marker, do this:
Note: you must first add a clip to the timeline before you can start adding timeline markers. |
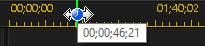
1.Drag the timeline slider to the position/timecode where you want to add the timeline marker.
2.Right-click anywhere on the ruler and then select Add Timeline Marker.
3.Input a Note for the new timeline marker, if required.
4.Click on OK to add the new timeline marker at the timeline slider position.
Once a timeline marker is added, media will snap to it when added to a track in the timeline.
Note: you can manually drag a timeline marker to different position if the original is not in the exact location you wanted it. Expand the timeline ruler for a more precise placement, if necessary. |
Right-click on the timeline ruler and then select Edit Timeline Markers to view a list of all the timeline markers you have added. In this list you can remove any of the existing markers, or double-click in the Note column to edit the associated text.
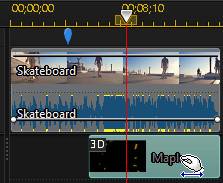
Clip Markers
You can manually add markers to a selected clip in the timeline. Once added, media clips and effects snap to the clip markers, allowing for more precise editing.
Adding Clip Markers
To add a clip marker, do this:
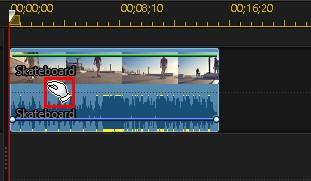
1.First, ensure that the clip marker track is displayed. To display it, right-click on the timeline and then select Show Clip Marker Track.
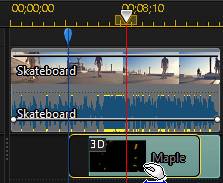
2.Select the clip on the timeline.
3.Drag the timeline slider to the moment/time position in the clip where you want to add the marker.

4.Right-click at the timeline slider position on the clip marker track,
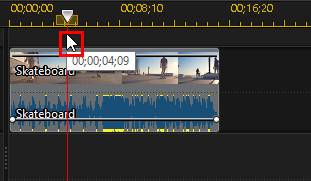
and then select Add Clip Marker.
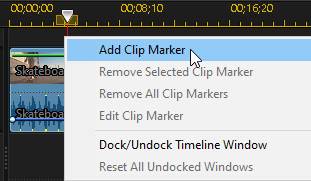
5.Input a Note for the new clip marker, if required.
6.Click on OK to add the new clip marker.
Once a clip marker is added, media and effects will snap to it when added to a track in the timeline.
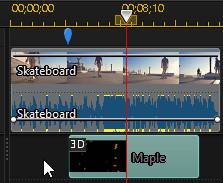
Note: you can manually drag a clip marker to different position if the original is not in the exact location you wanted it. Also, if you move the media clip to another position on the timeline, its clip markers move with it. |
Function Buttons
When you select media that is on the timeline, whether it's a video clip, image, audio clip, effect, title effect, etc., several function buttons display above the timeline. These buttons let you perform a variety of tasks or gain access to some important features of CyberLink PowerDirector.
The function buttons that are available depend on the type of media content you select. However, whenever you select media, the  button is always displayed. Click to gain access to more timeline functions, which vary depending on the selected media.
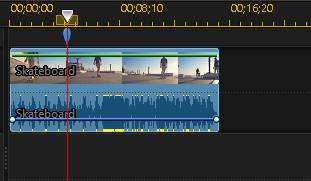
Range Selection
Click and drag one of the orange nodes on either side of the timeline slider to select a range* of media on the timeline.
Note: * optional feature in CyberLink PowerDirector. Check the version table on our web site for detailed versioning information. |

Once you have selected a range, right-click on the selection, select Loop Playback, and then click the play button to continuously play back the selected range. You can also cut or copy the range, and then paste it to another position on the timeline. You can also use this feature to manually highlight a portion of a clip that you want to then remove or trim out.
You can click Produce Range to produce just the selected range in the Produce window, outputting it as a video file that will be added to the media library. See Producing Selected Range on Timeline for more information. You can also render a preview of the selected range in the project preview window.
Click Lock Range if you want to lock the selected range. Once locked, you can more easily preview and even add additional media into the range for previewing, rendering, or producing. Click Lock Range again to unlock the selected range.
Track Manager
In the Track Manager* you can add additional video and audio tracks to the timeline, and enable the effect tracks. You can have up to 100 video tracks (with or without an audio track) in the timeline, add up to 97 additional audio tracks, and up to five effect tracks.
Note: * optional feature in CyberLink PowerDirector. Check the version table on our web site for detailed versioning information. |
Adding Tracks to Timeline
To add tracks to the timeline, do this:
Note: CyberLink PowerDirector auto adds a video and audio track for you when all the current video/audio tracks in the timeline have media on them. |
1.In the timeline mode, click on  to open the Track Manager.
2.In the Video section, enter in the number of video tracks you want to add to the timeline. By default, one track is added, but you can add up to 97 video tracks (100 in total) to the timeline, as required.
Note: if you don't want your additional video tracks to have a track for its audio, enter in 0 tracks in the Audio section. |
3.In the Video section, select the Position in the timeline where you want to add the video tracks.
4.In the Audio section, enter in the number of audio tracks you want to add to the timeline. By default, one track is added, but you can add up to 97 audio tracks (100 in total) to the timeline, as required.
Note: if you only want to add an audio track (i.e. without a linked video track), enter in 0 tracks in the Video section. |
5.In the Audio section, select the Position in the timeline where you want to add the audio tracks.
6.In the Effect section, enter in the number of effect tracks you want to add to the timeline. You can add up to five effect tracks.
7.In the Effect section, select the Position in the timeline where you want to add the effect tracks.
8.Click on OK to add the tracks to the timeline.
To quickly remove any unwanted tracks from the timeline, just right-click on the timeline and then select Remove Empty Tracks.
Customizing Timeline Tracks
In CyberLink PowerDirector you can customize the layout of the workspace timeline and its tracks to fit your preference.
Customizing Track Names
To make it easy to identify all of your tracks if you have lots of media on multiple tracks, drag the left sidebar to reveal the track names.
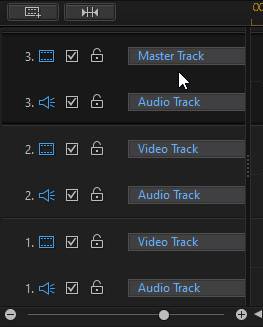
You can give all the tracks in the timeline a custom name as required.
Reordering Tracks
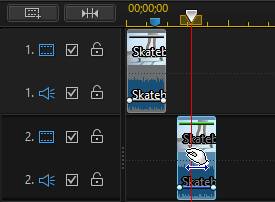
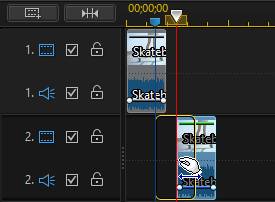
You can reorder the video tracks in the timeline if required. To reorder, click on the left sidebar and drag the track to the new position in the timeline.
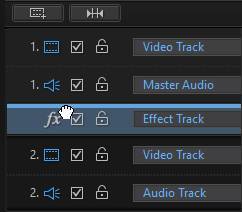
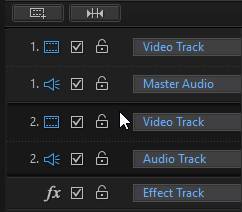
You can also drag the effect track to a new position in the timeline. Effects on the effect track are applied to all video tracks that are positioned above it in the timeline.
Adjusting Track Height
Double click on a track's left sidebar to quickly adjust the track height. You can also click and drag the bottom of a track on the left sidebar to manually resize it to your preference.

Right-click on the timeline and select Adjust Video Track Height to adjust the height of all the video tracks in the timeline to one of the default sizes. Select Adjust Audio Track Height to resize all of the audio tracks and each video track's corresponding audio track.
Locking/Unlocking Tracks
To lock a track in the timeline, click  at the left of the track. When a track is locked, you cannot add new clips to the track, or move or edit the clips it contains. To unlock a track in the timeline, click
  to the left of the track.
Enable/Disable Tracks
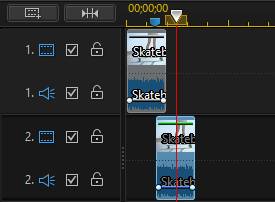
To disable a track in the timeline*, deselect  to the left of the track. When a track is disabled, the media it contains is not displayed in the Preview window. This allows you to preview your project by tracks so you can concentrate on the track you are working on.
Note: * optional feature in CyberLink PowerDirector. Check the version table on our web site for detailed versioning information. |
To enable a track in the timeline, select  to the left of the track.