CyberLink PowerDirector Help
When you add independent audio to any of the audio tracks on the timeline, it is important to ensure that it syncs with the video in your production. CyberLink PowerDirector displays the audio waveform on each clip that is added to the timeline. The waveform is useful when trimming or splitting the audio clip, and also when trying to sync audio to the video in your production.
Note: if you are trying to sync audio in an audio clip with the audio is a video clip (because they have the same source audio), you can use Sync by Audio to sync the clips. |
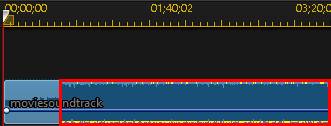
You can even zoom in on the timeline for more precise syncing, as the waveform is viewable down to the 1/10 frame level.
Note: if an audio clip's waveform is not displayed, it may be because this option was disable in preferences. You can enable it again by selecting Show sound waveform in timeline in General Preferences. |
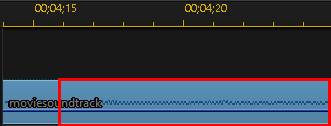
Once zoomed in, you can use the waveform in conjunction with Timeline Markers to sync media more precisely in your video production.
Music Beat Detection
Use the Music Beat Detection* feature in CyberLink PowerDirector to analyze audio clips or video clip's with music in your video production. Once analyzed, music beat clip markers are added to the clip marker track to help you sync the audio to the video in your production. You can also manually add music beat clip markers.
Note: * optional feature in CyberLink PowerDirector. Check the version table on our web site for detailed versioning information. |
You can then use these music beat clip markers for more precise arrangement and syncing of media with the added music.
To add music beat clip markers, do this:
1.Add an audio clip or video clip with music to the timeline.
2.Right-click on the clip and then select Use Automatic Music Beat Detection. The Automatic Music Beat Detection window opens.
3.Use the slider to set the Minimum time between beat markers. For example, if you know the beats in the music are once a second, you can set the slider to apply markers ever 2.0 seconds if you want to place media on every other beat.
4.Click Detect. CyberLink PowerDirector will analyze the clip, and then detect and apply the music beat clip markers to the clip marker track.
5.Click on Apply to close the Music Beat Detection window.
Once the music beat clip markers are added, media will snap to them when added to a track on the timeline.


Also note that the music beat clip markers are connected to the clip. So if you move the clip on the timeline, its music beat clip markers will move with in on the track.
To remove the music beat clip markers, do one of the following:
•remove the music clip from the timeline.
•right-click on a music beat marker on the clip marker track, and then select Remove Selected Clip Marker.
•right-click on the clip marker track, and then select Remove All Music Clip Markers.
Manually Adding Music Beat Clip Markers
To manually add music beat clip markers to the clip marker track, do this:
1.Add an audio clip or video clip with music to the timeline.
2.Right-click on the clip and then select Use Automatic Music Beat Detection. The Use Automatic Music Beat Detection window opens.
3.If required, use the magnification tools to zoom in on the audio waveform for the selected clip.
4.Manually drag the timeline slider to the position on the audio waveform where you want to add the music beat clip marker.
5.Click Add (or the press the A key on your keyboard) to add a music beat clip marker at the current position.
6.Repeat the above steps to add as many music beat clip markers as you want.
7.Click on Apply to close the Music Beat Detection window.
Note: you can also use the player controls to play the clip, and then continually click the Add button (or press the A key on your keyboard) to add the music beat clip markers when you hear a beat. |