CyberLink PowerDirector Help
Click on the Motion tab to add motion* to masks, allowing them to move across the screen. You can choose from a number of predefined motion paths or create your own custom motion. You can also add a rotation effect to the mask.
Note: * optional feature in CyberLink PowerDirector. Check the version table on our web site for detailed versioning information. |
Using a Motion Path Template
To add motion to mask you can select a motion path template on the Motion tab that fits your requirements. Note that keyframes are added to the Position track of the Mask Designer keyframe timeline. These motion path templates have predefined motion in them, but you can customize the motion. See Customizing Mask Motion and Utilizing Mask Keyframes for detailed information on using keyframes to customize mask motion.
Customizing Mask Motion
The Mask Designer uses keyframes to customize the motion of masks. Keyframes are frames of your video that define the start and end points of an effect, which in this example is motion.
Note: some masks have predefined motion already applied. |
To customize the motion of masks:
•drag an existing keyframe to a new location in the preview window. The mask will follow the modified path to get to the changed keyframe position.
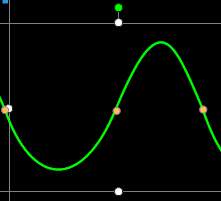
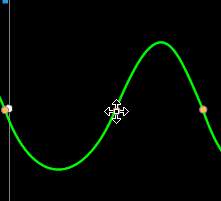
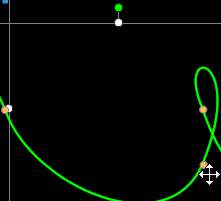
•drag the path line to alter the path the mask takes to get to the next keyframe.


•use the player controls to find a position on the motion path, and then click  on the Position track of the keyframe timeline to add a new keyframe at a new position, if required.
Customizing the Speed of Mask Motion
You have full control over the speed to the mask's motion. The following three factors determine the speed of the mask's motion.
Note: on the Properties tab in Object Settings you can manually adjust the mask position at keyframes and use ease in/out to make the movement look smoother. See Changing Object Settings for more information. |
Distance Between Keyframes
The distance between each keyframe contributes to the speed of the mask motion. The further the distance between each keyframe, the quicker the mask needs to move to get to the next keyframe.
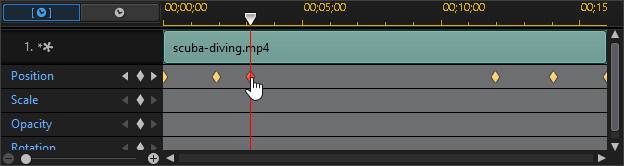
Keyframe Timeline
The keyframe timeline is located below the preview window. Each keyframe in the motion path has a corresponding marker on the keyframe timeline.
Note: if you cannot find the keyframe timeline in the Mask Designer, just click the |
 button under the preview window to display it.
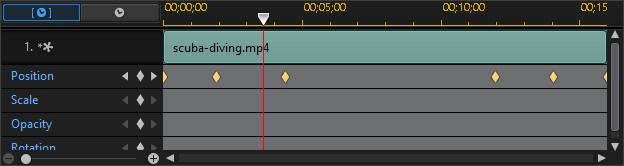
If the selected media clip on the timeline has a duration of 10 seconds, the keyframe timeline is 10 seconds long. To increase the speed of a mask's motion, drag a keyframe marker closer to the previous keyframe marker.
Saving a Custom Mask Motion Path
Once you finish modifying your mask's motion path you can save it for future use. To save a motion path, click on  to save it as a custom path. It is then available in motion path list the next time you want to use it.