CyberLink PowerDirector Help
There are three types of motion tracking effects that can be added to objects in the Motion Tracker: title text, media clip, and a mosaic, spotlight, or blur effect.
Note: you can only add one of these tracking effects to a single tracker. If you want to add more than one, just track the same object multiple times, i.e. more than one tracker. |
The motion tracking effects can be added before or after the object is tracked. You can also edit the tracking effect properties at any time by selecting the tracker in the Motion Tracker timeline.
Note: if you are adding a motion tracking effect to an object that is only tracked for a portion of the clip, the timeline slider must be over the tracker (green area) in the timeline before you can edit the motion tracking properties. |
Adding Title Text
Click the  button to add title text that will move and dynamically change size (if enabled) as it follows the tracked object. Once clicked, update the title text properties as follows:
1.Enter the required text in the text box provided.
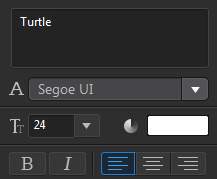
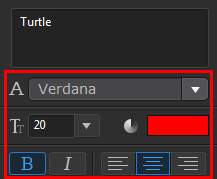
2.Be sure to set the font face style, size, color, and layout using the available font options.
3.Set the title text options as follows:
•Backdrop: select this option to add a customized backdrop for your title text. Available options allow you to change the backdrop's size, position, opacity, and more.
You can customize the backdrop using the following options:
▪Backdrop type: select the preferred type of backdrop.
▪Fill type: set the color and texture of backdrop using the following options in the Fill type drop-down:
•Uniform color: select this option if you want the backdrop to be one solid color. Click the colored square to open the color palette and select the desired backdrop color.
•2 Color gradient: select this option if you want the backdrop color to change from one color to another using a gradient. Click the colored squares to set the beginning and ending colors, and then drag the Gradient direction control to set which way the color flows.
•Texture: select this option to give the backdrop texture by selecting one of the available images. You can also browse to another folder on your computer to use your own image for the texture. Based on the color properties of the imported image, CyberLink PowerDirector applies a custom texture to the backdrop.
▪Width: use the slider to customize the width of the backdrop.
▪Height: use the slider to customize the height of the backdrop.
Note: deselect the Maintain aspect ratio option if you only want to change the backdrop's width or height. |
▪Opacity: use the slider to set the opacity of the backdrop.
▪Offset X: use the slider if you want to move the backdrop in the title along the X axis, i.e. left or right.
▪Offset Y: use the slider if you want to move the backdrop in the title along the Y axis, i.e. up or down.
•Border: select this option if you want to include a border on the text. Click  to set the border color.
•Maintain aspect ratio: select this option to have the title text's aspect ratio remain constant as it is resized as it moves with the object.
•Smooth: select this option if there is a lot of movement by the object. This will minimize the amount of shake on the text as it follows the object. Select the Smoother option if the shake is severe.
•Adjust effect size with tracked object: select this option if you want the title text to dynamically resize as the tracked object's size changes.
Note: once you exit the Motion Tracker and your changes are applied to the video clip, a title text template is added to the video timeline independently. If required, you can perform advanced editing on the title text's font, motion, size, etc. in the Title Designer. See Modifying Titles in the Title Designer for more information. |
Adding Media Clips (Images, PiP Objects, and Videos)
Click the  button to add an image, PiP object, or video clip that will move and dynamically change size (if enabled) as it follows the tracked object. Once clicked, add the media clip as follows:
1.Click the Import Media Clip button, and then:
•Import From Hard Drive: to import a file that is on your computer's hard drive.
•Import From Media Room: to import a file you previously imported into the current PowerDirector project.
•Import From Video Overlay Room: to import a video overlay that is currently in your Video Overlay (PiP Objects) Room.
2.If required, resize the media clip in the preview window to your liking.
3.Set the media clip options as follows:
•Border: select this option if you want to include a border around the media clip. Click to set the border color.
•Smooth: select this option if there is a lot of movement by the object. This will minimize the amount of shake on the media clip as it follows the object. Select the Smoother option if the shake is severe.
•Adjust effect size with tracked object: select this option if you want the media clip to dynamically resize as the tracked object's size changes.
Note: once you exit the Motion Tracker and your changes are applied to the video clip, the added media clip is added to the video timeline independently. If required, you can perform advanced editing on the clip's motion, size, etc. in the PiP Designer. See Modifying Media in the PiP Designer for more information. |
Adding Mosaic, Spotlight, or Blur Effects
Click the  button to add a mosaic, spotlight, or blur effect that will move and dynamically change size (if enabled) as it follows the tracked object. Once clicked, add the effects as follows:
Note: motion tracking mosaic, spotlight, and blur effects are not available in 360º video projects. |
1.From the available drop-down, select the effect you want to apply:
•Mosaic: this effects adds a pixelated blur on portions of the tracked object, for example a person's face.
•Spotlight: this effect highlights the tracked object in the video.
•Blur: this effect blurs out portions the tracked object in the video.
•Gaussian Blur: this effect applies a softer blur on the tracked object in the video.
2.If required, resize the effect in the preview window to your liking.
3.Depending on the effect you selected, modify the effect properties as follows:
•Grid scale: for the mosaic effect, drag this slider to adjust the size of the squares in the pixelated blur.
•Light color: for the spotlight effect, click the colored box to set the color of the spotlight.
•Brightness: for the spotlight effect, drag this slider to adjust the brightness of the spotlight.
•Gradient: for the spotlight effect, drag this slider to adjust gradient and size of the spotlight.
•Mask Type: for blur/gaussian blur, select the shape of the blur applied.
•Degree: for blur/gaussian blur, use this slider to set the strength of the blur.
•Gradient Depth: for blur/gaussian blur, use the slider to soften the blur's gradient edge.
•Invert effect area: for blur/gaussian blur, select this option to invert the blurred area. When selected, the area outside the mask is blurred out.
•Smooth: for all the effects, select this option if there is a lot of movement by the object. This will minimize the amount of shake on the effect as it follows the object. Select the Smoother option if the shake is severe.
•Adjust effect size with tracked object: for all the effects, select this option if you want the effect to dynamically resize as the tracked object's size changes.
Note: once you exit the Motion Tracker and your changes are applied to the video clip, you can perform advanced editing on the effect in the Effect Settings panel. See Modifying a Video Effect for more information. |