CyberLink PowerDirector Help
360° videos allow the viewer to choose where they look during playback. When creating a standard 2D/conventional video (non 360 project) using 360° footage, you can customize this direction of view in 360° video clips using keyframes. You can customize the direction of view using object tracking or by doing it manually.
Note: if you want to change the start view of a 360° video in a 360° video project, see 360º Start View Setting. |
Using Object Tracking to Customize Direction of View
With object tracking enabled, CyberLink PowerDirector can track a selected object in a 360° video clip as it moves within the 360° environment. This will auto customize the direction of view in your video.
To use object tracking, do this:
1.Select a 360° video clip on the timeline and then select Tools > View Designer.
2.In the Projection mode drop-down, ensure that Standard 2D is selected.
3.If required, use the player controls or drag the timeline slider to the position in your video clip where you want to begin tracking the object.
4.Use the navigation controls, or click and drag your mouse in the preview window, to find the object you want to track in the 360° environment.
![]()
5.Select the Object tracking option and then place and resize the tracker selection box on the object you want to track.
![]()
Note: if the point in your video where you want to track the object is not at the beginning of the clip, click |
 to set the start point of the object tracking.
6.If required, find the position in the video where you want the tracking to stop and then click  .
.
![]()
Note: if you want to track an object for the entire duration of the clip, you do not have to use the mark in and out buttons. |
7.Click the Track button. CyberLink PowerDirector will track the selected object as it moves in the 360° environment, customizing the direction of view.
![]()
8.When the tracking is complete, use the player controls to view the results.
Note: if you did not track an object for the entire duration of a video clip, you can use the available controls to manually customize the direction of view in the rest of the clip. |
Manually Customizing Direction of View
To manually customize the direction of view in a 360° video clip, do this:
1.Select a 360° video clip on the timeline and then select Tools > View Designer.
2.In the Projection mode drop-down, ensure that Standard 2D is selected.
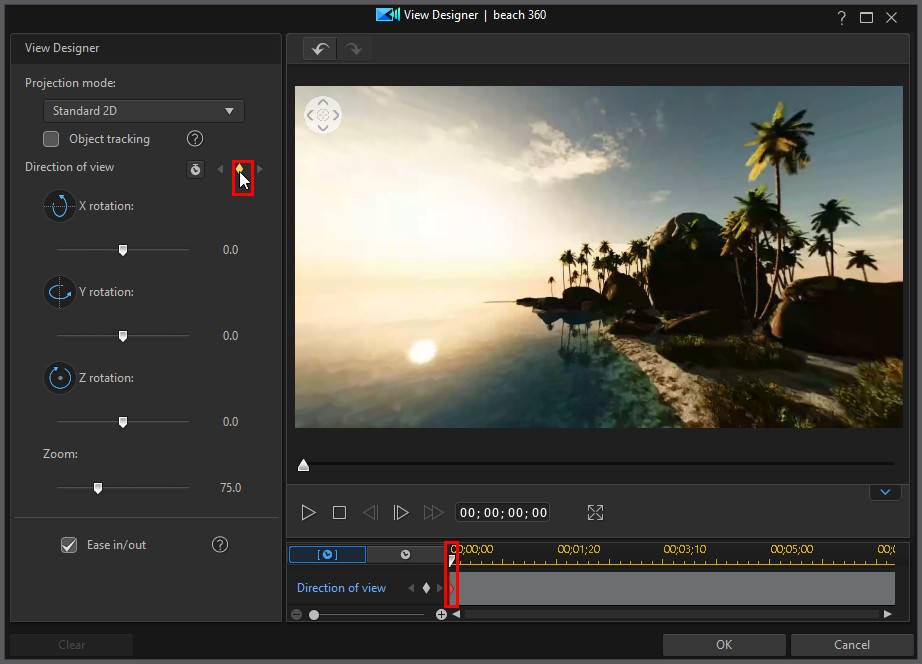
3.In the View Designer, click  to add a keyframe at the beginning of the video.
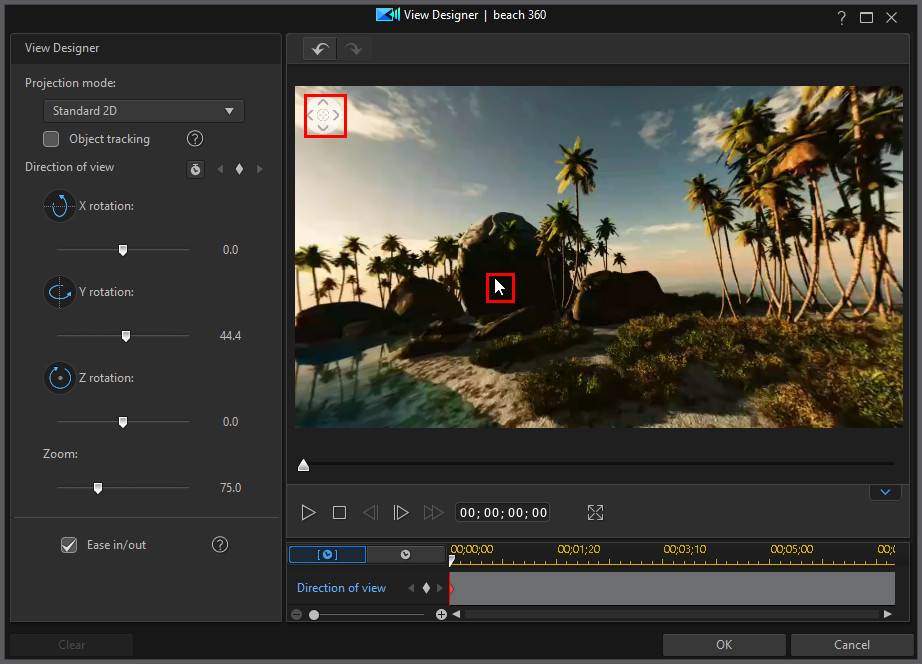
4.If required, set the direction you want the camera (audience's view) to be pointing at the beginning of the video. You can do this by clicking and dragging your mouse in the preview window, or using the navigation controls in the top left corner of the preview window.
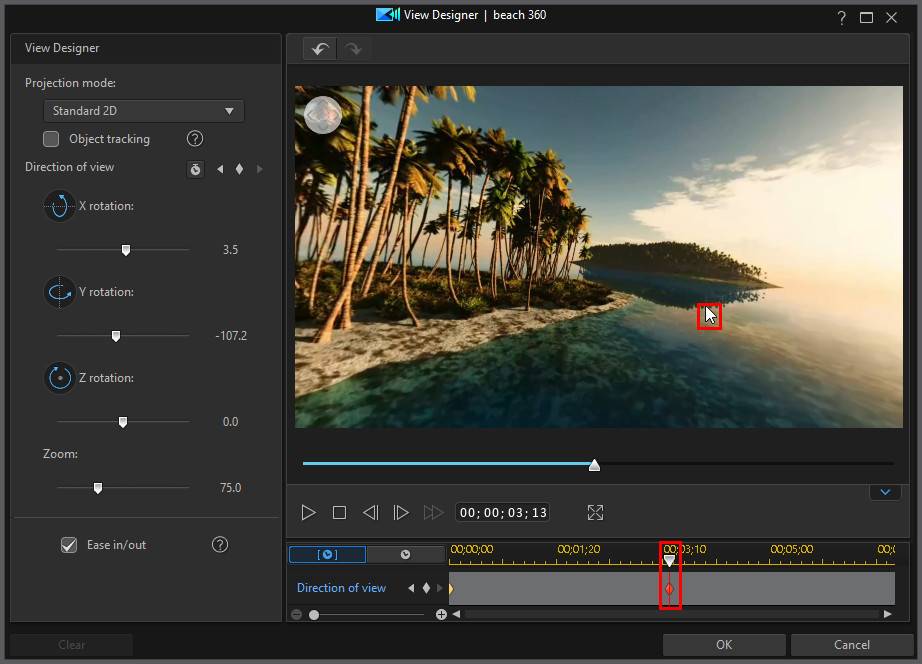
5.Use the playback controls, or drag the timeline slider to a point in the video where you want the camera to have a different direction of view, and then pause the video.
6.Once again, set the direction of view by clicking and dragging on the preview window, using the navigation controls, and/or the Zoom in/out slider. This will add another keyframe to the Direction of view keyframe timeline, and the audience will have this view at this point in the video's playback.
Note: if required, you can also use the X, Y, Z rotation and Zoom (or use your mouse's scroll wheel) sliders to customize the view at the first or any keyframe. |
7.Repeat steps 5 and 6, changing the direction of view as many times as required (or setting all the points (keyframes) where you want the camera to be facing at specific times in the video clip).

8.When you are done, use the playback controls to preview the video. Click OK to save your changes and add the updated video to the timeline.
Note: if you want to edit the video after closing the View Designer, just select it again on the timeline and then Tools > View Designer to reenter the window. |
Ease In/Out
Adjusting the direction of view and X, Y, and Z rotation sliders lets you manually create camera movements in your video. To change the direction of view/camera movement, you indicate when in the video you want the camera to be facing a specific direction by adding keyframes. To create the camera movement, CyberLink PowerDirector will ensure the camera is facing in the selected direction at the specified time in the video. However, this may cause the camera movements to appear jerky. To make the sudden camera movements look smoother, be sure to enable the Ease in/out option.
Modifying Direction of View Keyframes
At any time you can modify the keyframes added, by selecting them and changing the direction of view/zoom, or by dragging the keyframe to another position on the keyframe timeline.
Note: if you cannot find the keyframe timeline in the View Designer, just click the |
 button under the preview window to display it.
To remove a keyframe, select it on the keyframe timeline and then click .