CyberLink PowerDirector Help
After you finish creating your video production, click on Produce and then on the Create Disc tab to burn your video onto a disc, complete with a disc menu. You can also import additional videos and CyberLink PowerDirector projects, creating multi-layered professional looking disc in just a few simple steps.

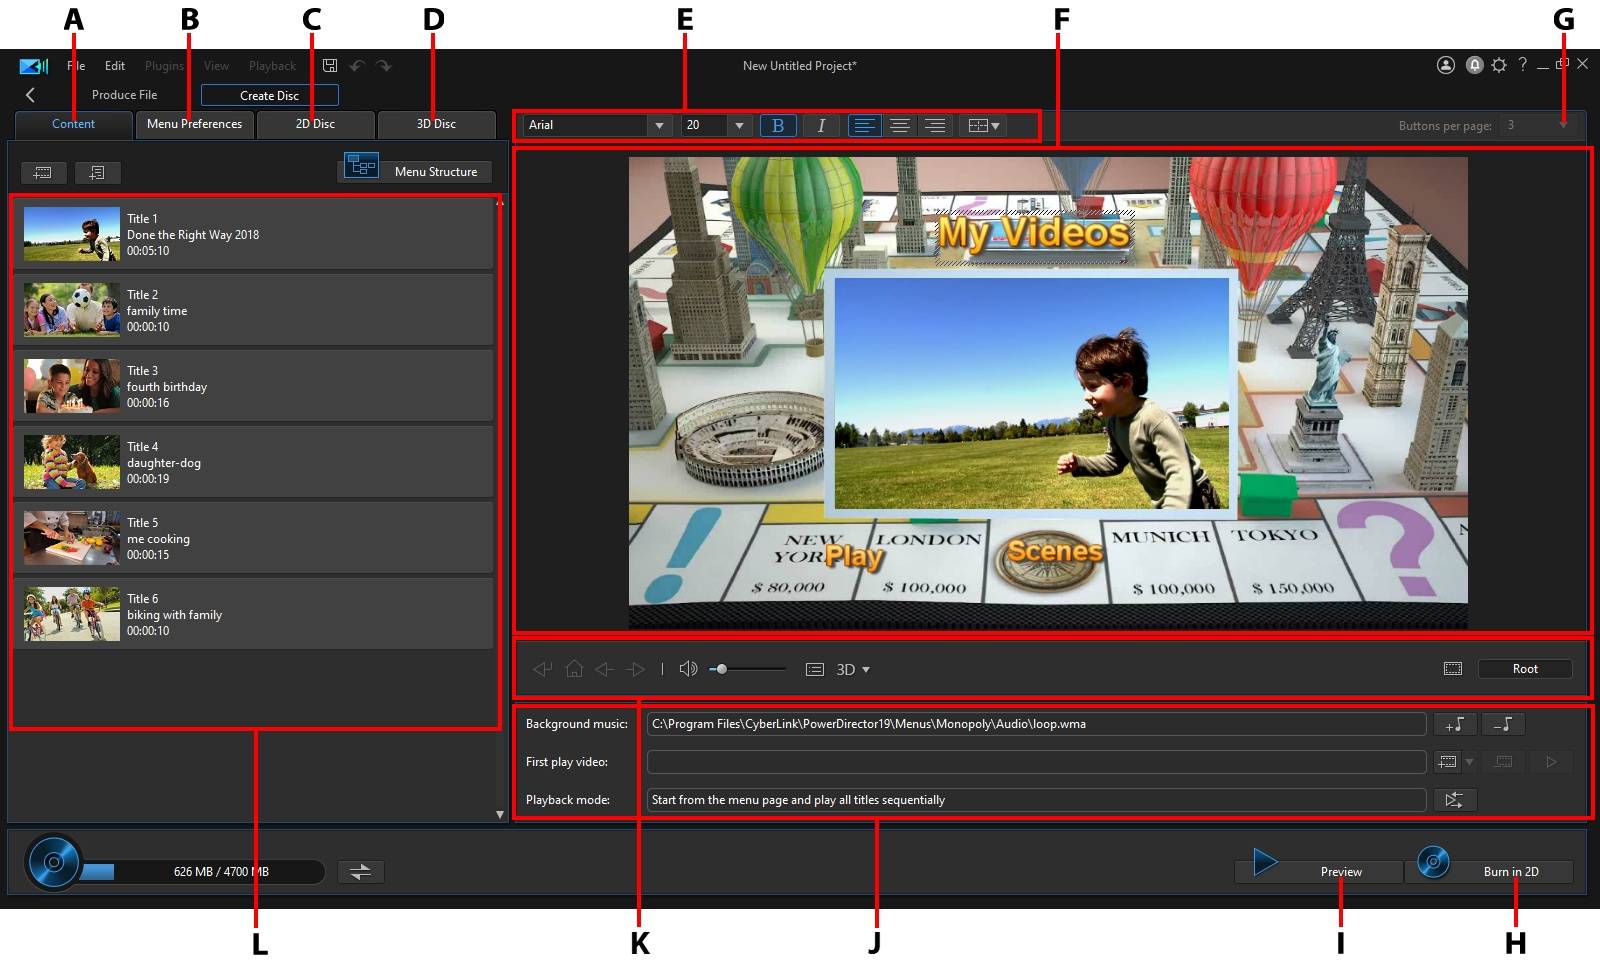
A - Disc Content Tab |
B - Menu Preferences Tab |
C - 2D Disc Preferences Tab |
D - 3D Disc Preferences Tab |
E - Disc Menu Font Properties |
F - Disc Menu Preview Window |
G - Set Buttons Per Page |
H - Burn to Disc |
I - Preview Disc Menu |
J - Disc Menu Properties |
K - Menu Navigation Controls |
L - Disc Content |
Discs created in CyberLink PowerDirector can have one or more titles (video files or CyberLink PowerDirector projects), which are called Scenes on the final disc. Each title (or Scene) can have multiple chapters and include subtitles.
To create a disc menu and then burn your video production to disc, do this:
1.Click on the Create Disc button to open the Create Disc window. The video production you were working on is automatically imported into the window.
2.On the Content tab, click the  and
and  buttons to import additional titles (video files and/or PowerDirector projects) onto your disc. See Importing Additional Disc Content for more detailed information.
3.Click on the Menu Preferences tab and then select the menu in the library that you want to use on your disc. See Selecting a Disc Menu for more detailed information on selecting disc menus, or for information on customizing your own.
4.Edit the selected disc menu's properties, including customizing menu text, the number of buttons, background music, and more. See Editing Disc Menu Properties for more information.
5.If required, right-click on your selected disc menu's thumbnail in the library and select Modify to perform advanced editing on it in the Menu Designer. You can also create new disc menus and 3D* menus in the Menu Designer. See Customizing Disc Menus in the Menu Designer for more detailed information.
6.The last step is to burn your production to disc. Do one of the following:
•if your project is a standard 2D video production, click the 2D Disc tab. See Burning a Disc in 2D for more information.
•if your project is a 3D* video production, click the 3D Disc tab. See Burning a Disc in 3D for more information.
Note: * optional feature in CyberLink PowerDirector. Check the version table on our web site for detailed versioning information. |