CyberLink PowerDirector Help
You can perform more advanced editing on your disc menu in the Menu Designer*. You can also create a brand new disc menu template from scratch.
To edit an existing disc menu, right-click on the disc menu template in the library on the Menu Preferences tab and then select on Modify. To create a new disc menu template, click on the Create Menu button.

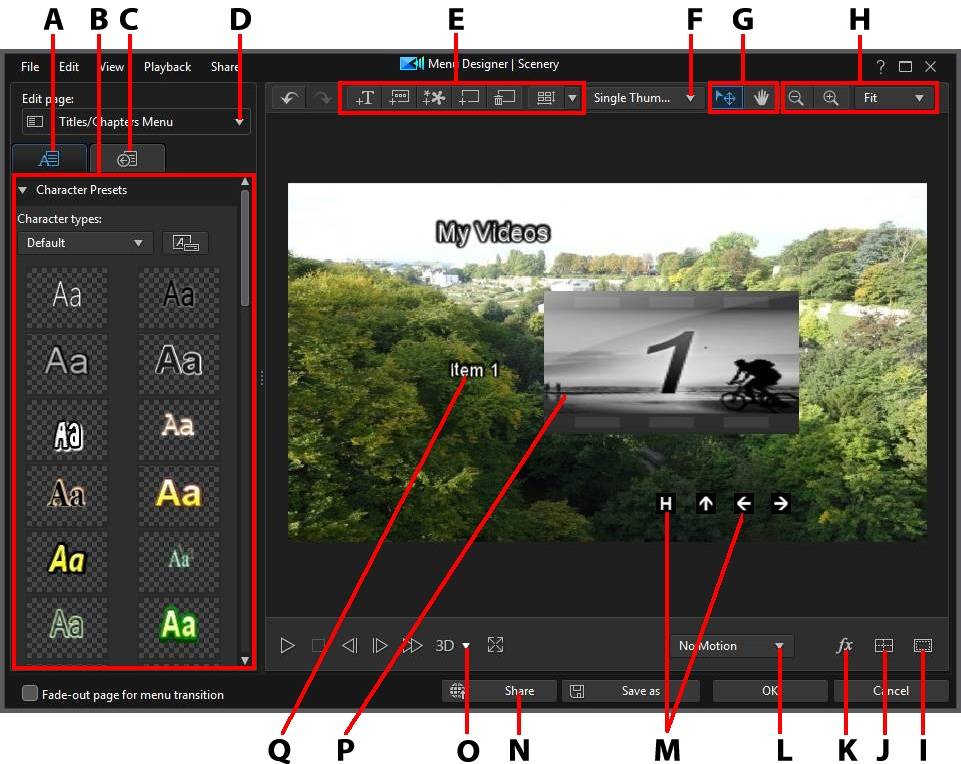
A - Change Object Properties Tab |
B - Menu Properties |
C - Set Button Properties Tab |
D - Menu Page View (Edit page) |
E - Add Media/Image/Text/Button |
F - Set Title/Scene Button Type |
G - Mode Selection |
H - Zoom Tools |
I - TV Safe Zone/Grid Lines |
J - Align Objects |
K - Select Video Effect |
L - Set Menu Motion |
M - Navigation Buttons |
N - Share on DirectorZone |
O - Enable 3D Depth |
P - Thumbnail Button |
Q - Text Menu Button |
|
Note: * optional feature in CyberLink PowerDirector. Check the version table on our web site for detailed versioning information. |
In the Menu Designer you can edit all three possible disc menu pages. Note that the titles/scenes (videos and projects on your disc) and chapters pages always have the same layout.
To modify a specific page, select Root Menu, Titles/Chapters Menu, or Subtitles Menu from the Edit page drop-down menu.
Note: the subtitles menu page is only available if you selected Create subtitles for disc when you added subtitles in the Subtitle Room. See Adding Subtitles for more information. |