CyberLink PowerDirector Help
To create a vertex selection* mask, do this:
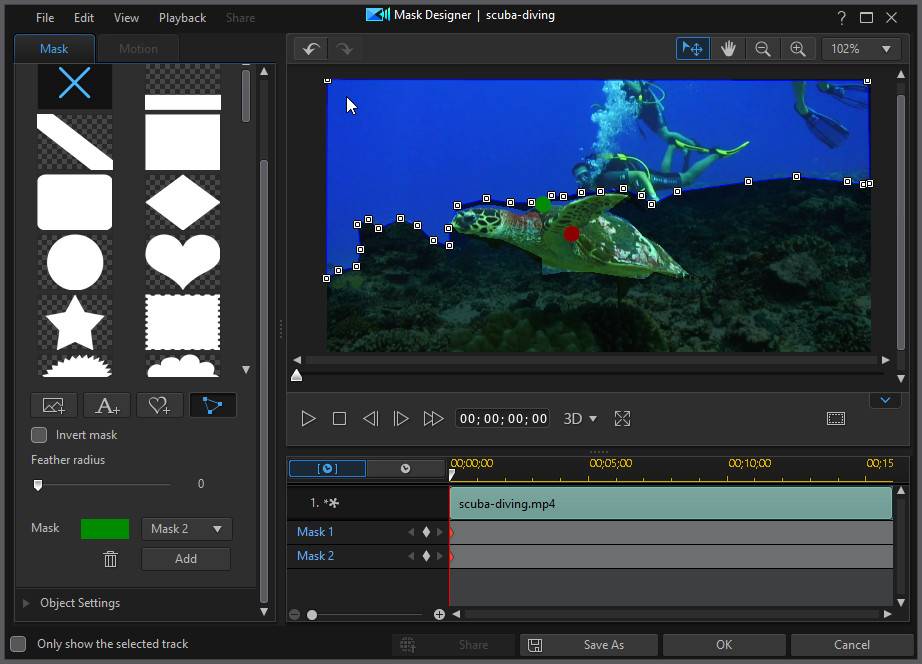
1.Select a media clip on the timeline and then select Tools > Mask Designer.
2.Click on the  button in the Mask Properties section of the Mask tab.
Note: * optional feature in CyberLink PowerDirector. Check the version table on our web site for detailed versioning information. |

3.Create the selection mask by adding node points by clicking your mouse around the object you want to mask.
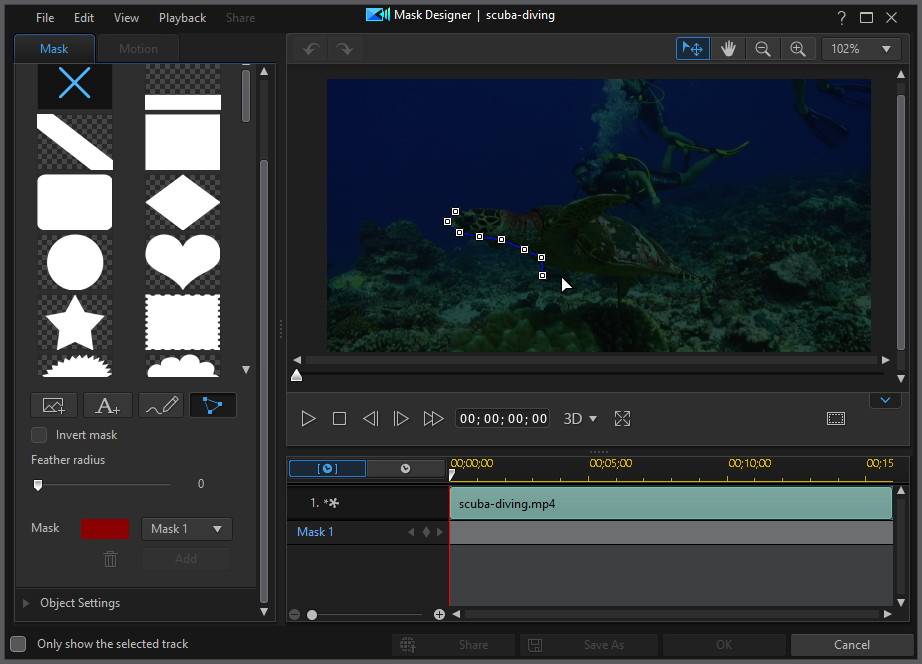
4.Continue adding node points around the outline of the area until an enclosed section is selected.
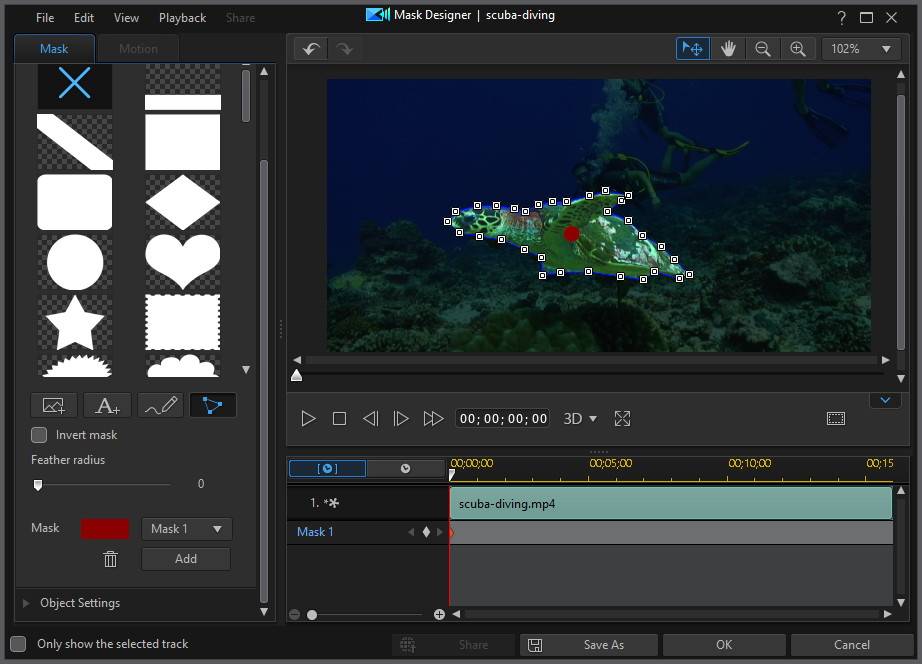
Note: to create horizontal or vertical lines using straight line control, just hold down the Shift key on your keyboard when adding node points. You can adjust the shape of the selection mask by clicking and dragging the nodes. Click and drag the connected white nodes to use a Bézier curve to better fit the mask to rounded edges. |

5.When you are done customizing your mask in the Mask Designer, click the OK button to save your changes. Your changes are applied to the selected media clip and updated on the video timeline. If you want to edit the mask further, just reselect the media clip on the timeline and then reenter the Mask Designer by selecting Tools > Mask Designer.
Adjusting Mask Position and Shape
If the selection mask you created appears off at any point during the duration of the video clip, you can easily adjust its position or shape.
Note: when you adjust the position or shape of a selection mask, CyberLink PowerDirector automatically adds a keyframe to the keyframe settings timeline to mark the change. See Utilizing Mask Keyframes for more information on keyframes. |
To adjust the selection mask position/shape, pause the video clip playback at the point when you want to make the adjustment and then do any of the following:
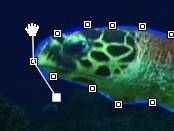
•click on a mask node to select it and then drag it to a new position to change the mask's shape.
•click on a mask node to select it, and then press the Delete key on your keyboard to delete it, if required.
•to add a new mask node, just hover your mouse over the line edge and click to add the required node.
•click on the mask color label and then drag the entire mask to a new position.
Using Multiple Selection Masks
You can use up to five selection masks on a media clip. To create a new selection mask, do this:
1.Click the Add button in the selection mask section.

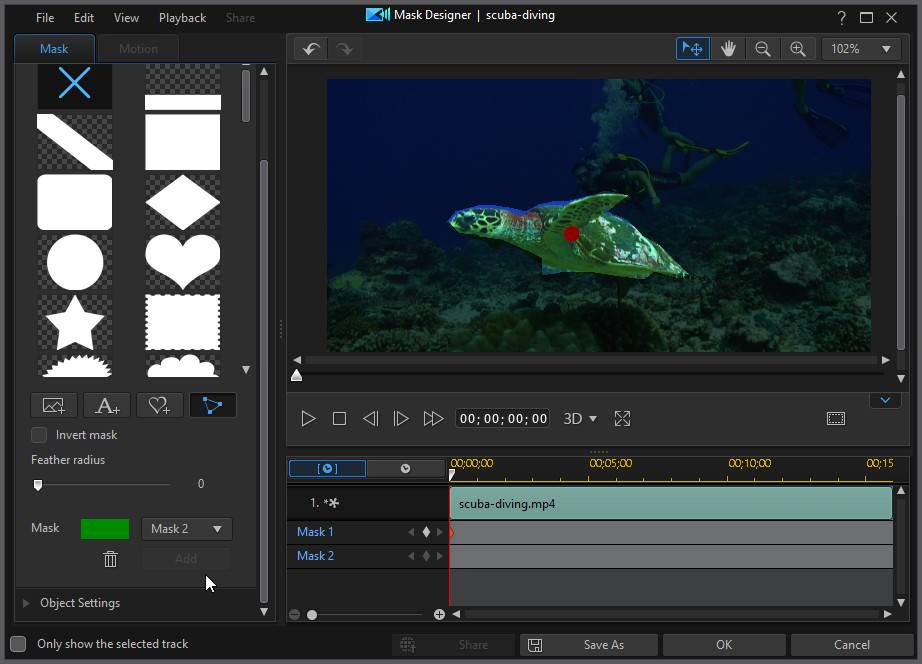
2.Use your mouse to manually select the area of the video frame you want to mask. CyberLink PowerDirector labels the mask with a new color.
3.You can switch among the created selection masks in the drop-down.

4.When you are done customizing your mask in the Mask Designer, click the OK button to save your changes. Your changes are applied to the selected media clip and updated on the video timeline. If you want to edit the mask further, just reselect the media clip on the timeline and then reenter the Mask Designer by selecting Tools > Mask Designer.