CyberLink PowerDirector Help
To create a test mask in the Mask Composer, do this:
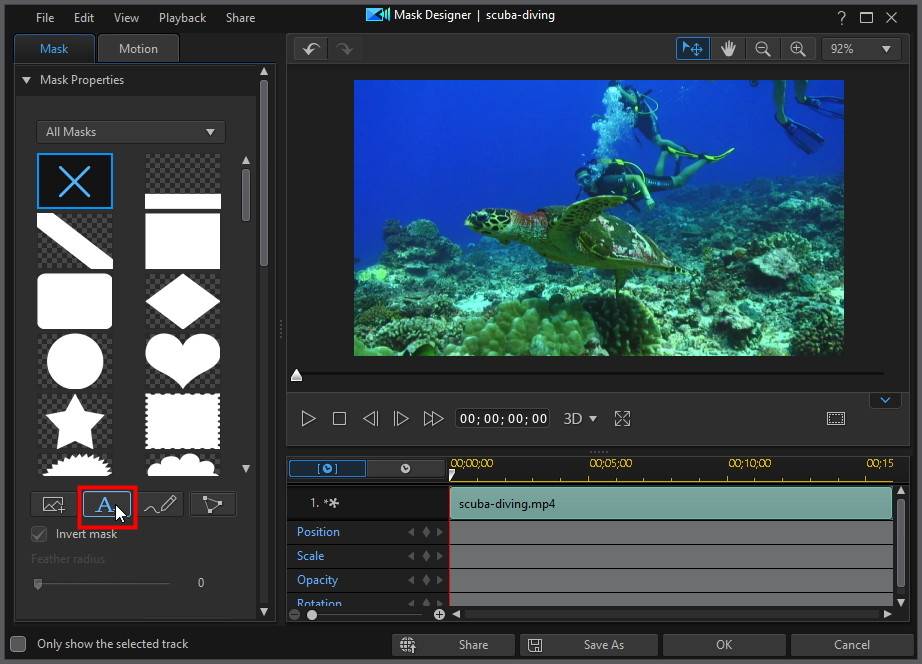
1.Select a media clip on the timeline and then select Tools > Mask Designer.
2.Click on the  button in the Mask Properties section of the Mask tab.
3.The Mask Composer will open, where you can create a custom mask using title text and images.
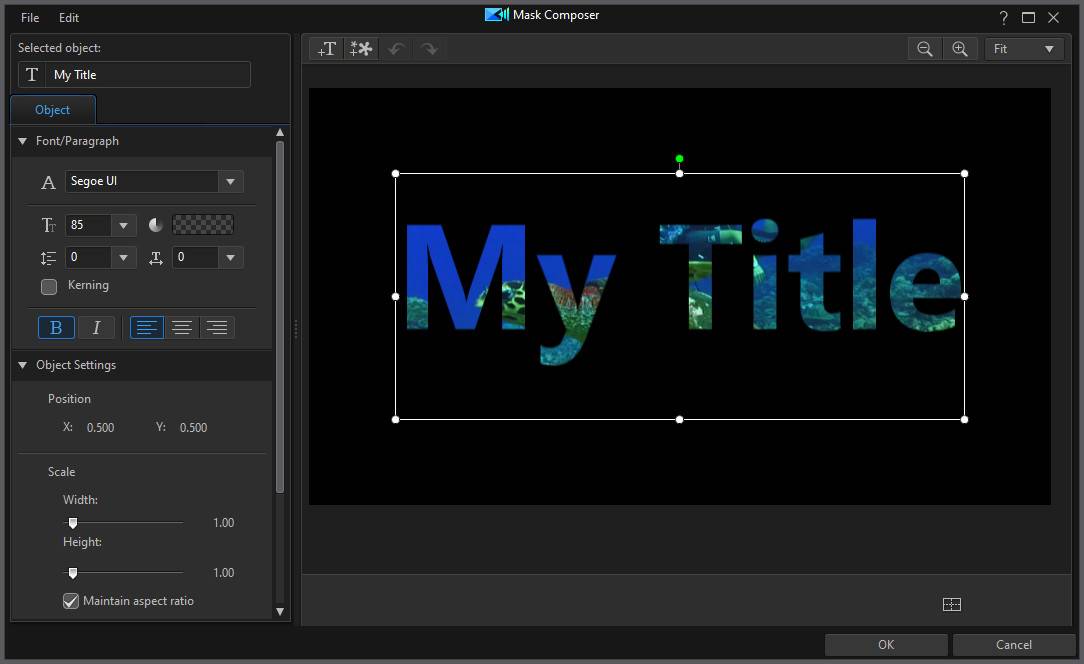
Editing Title Text
Click on the title text object and then enter the text you want to use in your custom mask.
Note: if required you can add more than one title text object in the mask by clicking on the |
 button and then clicking in the preview window to adding the title text box to the desired position.
Use the Font Type options to set the font type and size of the selected title text. You can also bold or italicize text, change the line and text spacing, and set the text alignment in the text box. If the font type you are using supports it, you can select the Kerning check box to reduce the space between the letters in the title text.

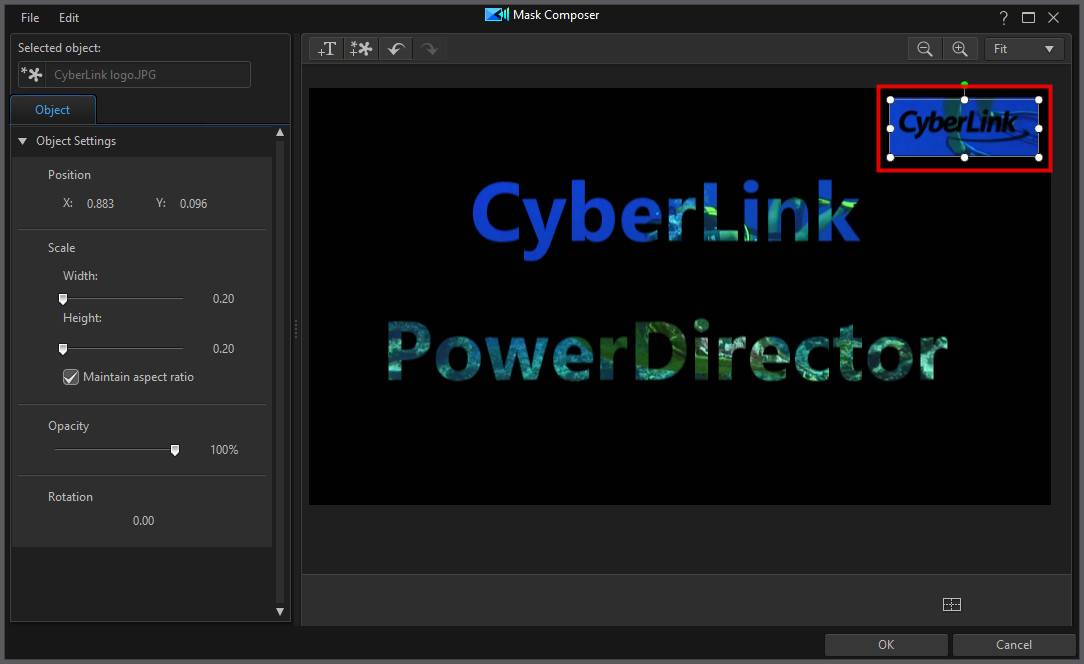
Mask Object Properties
In the Object Settings section you can change some of the basic properties of the mask. In the Position section, you can manually position the mask on the video frame, using the X and Y position fields to set the precise location of the middle of the mask.
Note: CyberLink PowerDirector sets the value of the top-left corner of the mask as the 0 axis, with the bottom-right corner having a value of 1.0, 1.0. The center position in the video frame is 0.500, 0.500. |
Use the Scale sliders to change the mask's size, or Opacity to make it less transparent.
Note: select the Maintain aspect ratio option if you want to ensure the mask's aspect ratio does not change while you are moving or resizing it. Deselect this option if you want to change the mask's shape or alter its aspect ratio. |
To rotate the mask, enter the Rotation amount in the field provided.
Importing Images
In the Mask Composer you can also click on the  button to import images for use in your custom mask. The lighter areas of the imported image become transparent once imported.
When you are done creating your mask, click OK to close the Mask Composer. Your changes will be saved and the new mask will be available in Mask Properties of the Mask Designer.
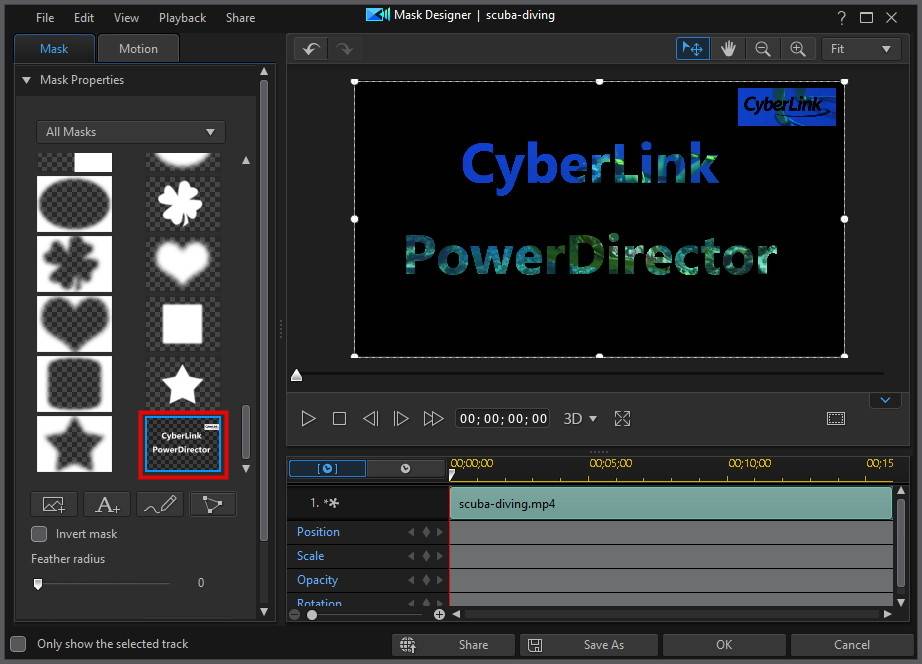
If you want to make further edits to your custom mask, just right click on its thumbnail and then select Modify to reenter the Mask Composer.
When you are done customizing your mask in the Mask Designer, click the OK button to save your changes. Your changes are applied to the selected media clip and updated on the video timeline. If you want to edit the mask further, just reselect the media clip on the timeline and then reenter the Mask Designer by selecting Tools > Mask Designer.