CyberLink PowerDirector Help
After you select a pan & zoom template for the selected image, click the Motion Designer* button to customize the motion in the Magic Motion Designer.
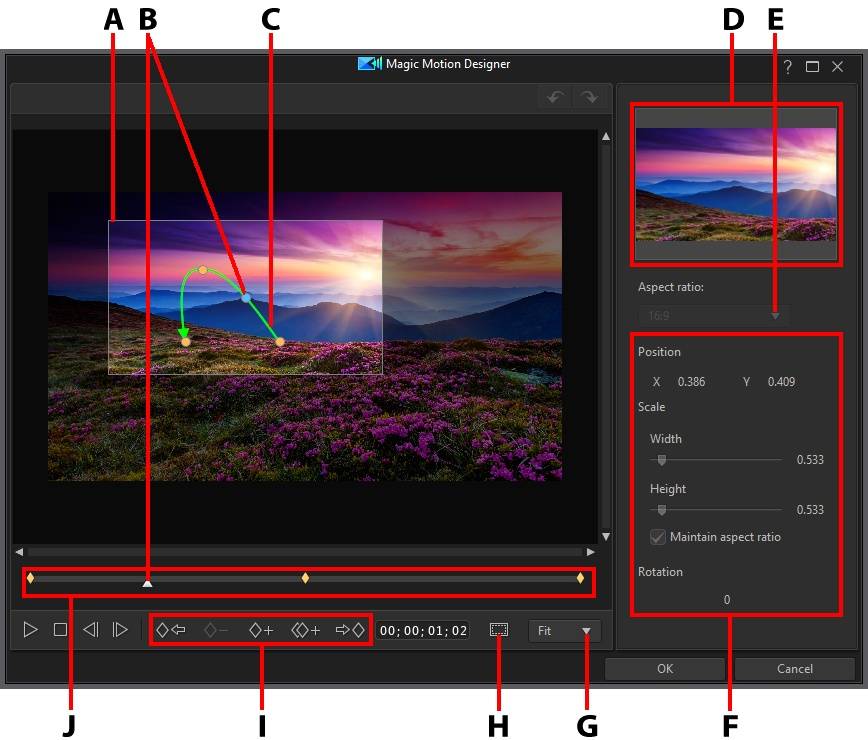
A - Focus Area |
B - Timeline Indicator |
C - Motion Path |
D - Focus Area Preview |
E - Focus Area Aspect Ratio |
F - Focus Area Properties |
G - Preview Window Zoom In/Out |
H - TV Safe Zone/Grid Lines |
I - Keyframe Buttons |
J - Keyframe Timeline |
|
|
Note: * optional feature in CyberLink PowerDirector. Check the version table on our web site for detailed versioning information. |
The Magic Motion Designer uses keyframes to customize the motion on an image. Keyframes are frames of your video that define the start and end points of an effect, which in this example is motion, rotation, or size of the focus area.
In the Magic Motion Designer you can:
•use the player controls or drag the slider to preview the current motion in the preview window.
•click on  to add keyframes to the keyframe timeline. By adding keyframes you can alter the motion, rotation, or size of the focus area between two points on the keyframe timeline.
•click on  to duplicate the previous or next keyframe on the keyframe timeline. Doing this copies the properties of the specified keyframe to the new position.
•set the focus area aspect ratio by selecting one of the available options on the right. Choose Freeform to manually resize the focus area shape to create a custom aspect ratio. You can also use the controls in the focus area properties to set the specific size of the focus area. The zoom results are displayed in the focus area preview.
•resize the focus area at keyframe positions on the keyframe timeline to define the areas on the image you want to highlight or focus on.
•click and drag the motion path to alter the movement of the focus area.
•add a rotation effect at keyframe positions on the keyframe timeline by entering the rotation amount in the field provided and then pressing the Enter key on your keyboard. You can also click and drag  on top of the focus area to rotate the focus area manually.
•click on to  to zoom in or out on the preview window. Zooming in is useful for precise movement of motion, while you can zoom out if you want to start the motion off screen.
•click on  to use the TV safe zone and grid lines to help with the precise placement of the focus area on the image. Select Snap to Reference Lines to have the focus area snap to the grid lines, TV safe zone, and boundary of the video area.