CyberLink PowerDirector Help
To edit an audio clip in the Audio Editor*, do this:
Note: * optional feature in CyberLink PowerDirector. Check the version table on our web site for detailed versioning information. |
1.Select an audio or a video clip (with audio) on the timeline, click the Tools button above the timeline, and then select Audio Editor. The Audio Editor window opens.
2.Decide whether you want the audio edits applied to all the available channels  , or click
  to only edit one channel.
3.If required, use range selection to select the portion of audio you want to edit.
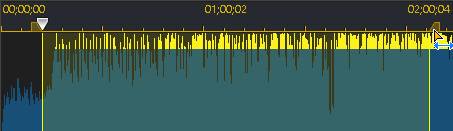
If you want to edit the entire clip, you can skip this step.
4.Make the edits to the audio as required using the available options. See below for a detailed description of each.
5.Once you are done, click OK to save your changes and update the audio clip in your project's timeline.
Volume
Dynamic Range Compression
Use this effect to adjust the audio file's dynamic range, i.e. the difference between high and low levels in the audio.
1.Select an audio or a video clip (with audio) on the timeline, click the Tools button above the timeline, and then select Audio Editor. The Audio Editor window opens.
2.Click the Dynamic Range Compression option.
3.Use the Output Gain slider to adjust the output gain for the processed file to make up for a decrease in the audio's volume.
4.Use the control sliders as follows:
•Limiter: adjust these sliders to aggressively limit high level signals. You can use the limiter to prevent clipping or distortion.
•Compressor: use these sliders to apply more gentle dynamic control to medium level signals and peaks.
•Gate/Expander: use these sliders to boost (expand) the level of soft signals. Note that the expander can have a ratio greater or less than 1.0. When the ratio is greater than 1, it is operating as a gate and any signals below the threshold will be decreased in volume.
3.If required, you can preview how the applied effect will sound by selecting Adjusted result and then clicking the Preview button. Select Original audio if you want to preview the original audio.
4.Click Apply to apply the dynamic range control.
Distortion
Pitch Shift
Use the Pitch Shift feature to change the pitch of the audio. The resulting effect is audio that sounds like it is sped up or slowed down, without changing the length of the audio.
1.Select an audio or a video clip (with audio) on the timeline, click the Tools button above the timeline, and then select Audio Editor. The Audio Editor window opens.
2.Click the Pitch Shift option.
3.Drag the slider right to adjust the pitch up, or left to adjust it down as required.
Note: increasing/decreasing by one semitone is equivalent to changing the overall the pitch up/down one musical note in a 12-tone scale. For example, C to C# (sharp) or C to Cb (flat). |
4.If required, you can preview how the adjusted audio will sound by selecting Adjusted result and then clicking the Preview button. Select Original audio if you want to play the audio at its original pitch.
5.Click Apply to adjust the pitch of the audio.
Vocal Transformer
Use the Vocal Transformer effect to transform the voice in an audio clip.
1.Select an audio or a video clip (with audio) on the timeline, click the Tools button above the timeline, and then select Audio Editor. The Audio Editor window opens.
2.Click the Vocal Transformer option.
3.Select one of the Presets from the drop down. Each preset provides a different effect to the voice.
4.If required, modify the advanced settings as follows:
•Pitch: use this slider to adjust the pitch of the transformed voice. Dragging the slider right will make the voice higher, while dragging it left will make it deeper.
•Timbre: use this slider to adjust the tone quality of the voice. Adjusting this slider can significantly change the characteristics of the voice.
Note: if you selected the Custom preset, you can then select Robot voice and/or Duck voice as a starting point for the custom voice you create using the above settings. |
5.If required, you can preview how the applied effect will sound by selecting Adjusted result and then clicking the Preview button. Select Original audio if you want to play the original audio.
6.Click Apply to apply the effect to the audio.
Adjustments
Equalizer
Select Equalizer effect to apply preset equalizer filters on your audio. You can also fully customize the overall sound of your audio using the available sliders.
1.Select an audio or a video clip (with audio) on the timeline, click the Tools button above the timeline, and then select Audio Editor. The Audio Editor window opens.
2.Click the Equalizer option.
3.If required, select an equalizer preset from the Presets drop down. Equalizer presets can enhance audio, and the preset you should select depends on the type of audio or genre of music you are editing.
4.If required, modify the advanced settings by dragging the equalizer sliders to customize the audio effect applied.
5.If required, you can preview how the applied effect will sound by selecting Adjusted result and then clicking the Preview button. Select Original audio if you want to play the original audio.
6.Click Apply to apply the equalizer effect to the audio.
Echo
You can add an echo to your audio, by adding a series of delayed and decaying sources of the original audio to it.
1.Select an audio or a video clip (with audio) on the timeline, click the Tools button above the timeline, and then select Audio Editor. The Audio Editor window opens.
2.Click the Echo option.
3.In the window that displays, select the echo preset from the Presets drop-down. Select the preset that best suits the sound you want to achieve.
4.If required, modify the advanced settings as follows:
•Initial delay time: use this slider to set how far behind, in milliseconds, the audio with the echo effect applied will start behind the original audio signal.
•Feedback: use this slider to set the ratio that determines how long the echoed sound will last. Dragging the slider left produces less of an echo, while dragging it right can produce an echo that never seems to fade out.
•Equalizer: use these sliders to adjust the room characteristics where the audio is being reflected to create the echo. More reflective surfaces create a brighter sound, while a room with absorbent walls creates an echo that is a lot darker.
5.If required, you can preview how the applied effect will sound by selecting Adjusted result and then clicking the Preview button. Select Original audio if you want to play the original audio.
6.Click Apply to add the echo effect to the audio.
Generate
Reverb
Use Reverb to apply an effect that reverberates the original audio, i.e. applies an echo-like effect to it.
1.Select an audio or a video clip (with audio) on the timeline, click the Tools button above the timeline, and then select Audio Editor. The Audio Editor window opens.
2.Click the Reverb option.
3.Select a reverb preset from the Presets drop-down. Select the preset that best suits the sound you want to achieve.
4.If required, modify the advanced settings as follows:
•use the Sparkle slider to add a grainy sound to the audio. The more sparkle applied, the grainier it will sound.
•use the Room width slider to widen a stereo audio signal without disturbing the low frequencies. This allows you to control the perceived location of the sound, ranging from a more centered source to one that is wider left and right.
•use the Room size slider to add reverberation to the audio signal, simulating it being played in a room. Larger values will simulate a larger room.
5.If required, you can preview how the applied effect will sound by selecting Adjusted result and then clicking the Preview button. Select Original audio if you want to play the original audio.
6.Click Apply to add the reverb effect to the audio.
Generate Noise
Use the Generate Noise feature to add a specified amount of generated noise, or static, into audio clips.
1.Select an audio or a video clip (with audio) on the timeline, click the Tools button above the timeline, and then select Audio Editor. The Audio Editor window opens.
2.Click the Generate Noise option.
3.Select one of the following types of noise from the Noise type drop-down:
•Normal: common white noise, or static, which can be quite loud to the listener.
•Pink: static like noise that sounds softer and quieter than normal white noise.
•Brown: a lower frequency static like noise, which is quite quiet compared to the others.
4.Click Apply to insert the noise.
Special
Noise Reduction
Use the Noise Reduction feature if your audio contains unwanted static, or other background noise.
1.Select an audio or a video clip (with audio) on the timeline, click the Tools button above the timeline, and then select Audio Editor. The Audio Editor window opens.
2.Click the Noise Reduction option.
3.Select the type of noise you want to remove from the Noise type drop-down.
4.Use the slider to adjust the amount of reduction applied to the audio.
5.If required, you can preview the repaired audio by selecting Applied result and then clicking the Preview button. Select Original audio if you want to play the original audio.
6.Click Apply to repair the audio.
Radio
Use the Radio effect to apply a filter to your audio that mimics the sound of a radio.
1.Select an audio or a video clip (with audio) on the timeline, click the Tools button above the timeline, and then select Audio Editor. The Audio Editor window opens.
2.Click the Radio option.
3.Select the Radio type from the drop down. Each type provides a slightly different effect to your audio.
4.If required, you can preview how the applied effect will sound by selecting Adjusted result and then clicking the Preview button on the playback controls. Select Original audio if you want to play the original audio.
5.Click Apply to apply the radio effect to the audio.
Phone
Use the Phone effect to apply a filter to your audio that mimics the sound over a phone.
1.Select an audio or a video clip (with audio) on the timeline, click the Tools button above the timeline, and then select Audio Editor. The Audio Editor window opens.
2.Click the Phone option.
3.Select the Phone type from the drop down. Each type provides a slightly different effect to your audio.
4.If required, you can preview how the applied effect will sound by selecting Adjusted result and then clicking the Preview button. Select Original audio if you want to play the original audio.
5.Click Apply to apply the phone effect to the audio.
Vocal Removal
Use the Vocal Removal to create a karaoke or instrumental version of your stereo music files.
1.Select an audio or a video clip (with audio) on the timeline, click the Tools button above the timeline, and then select Audio Editor. The Audio Editor window opens.
2.Click the Vocal Removal option.
3.Once selected, the vocals are automatically removed from the audio. If required, you can preview how the applied effect will sound by selecting Adjusted result and then clicking the Preview button. Select Original audio if you want to play the original audio.
4.Click Apply to remove the vocals from the audio.