CyberLink PowerDirector Help
Click  at the bottom of the rooms panel and then select Voice-Over Recording Room to open the Voice-Over Recording Room and record a narration with a microphone while watching a preview of your video production.
Note: access to the Voice-Over Recording Room is only available if CyberLink PowerDirector detects there is a microphone or other audio input device available. |
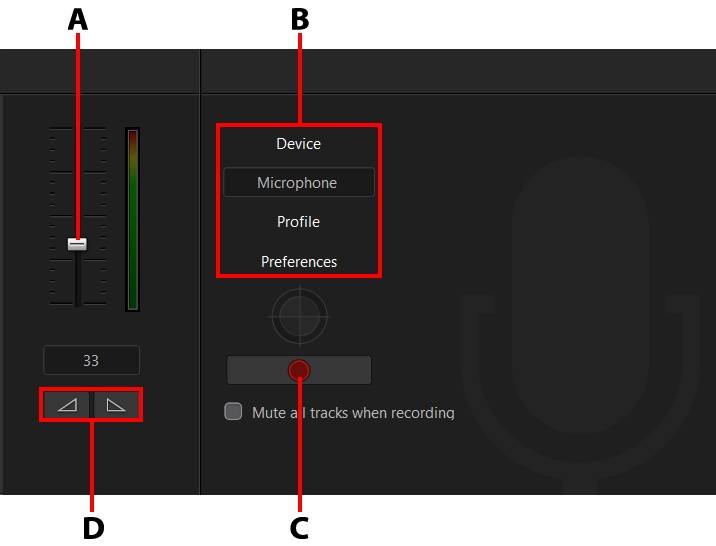
A - Recording Volume Level |
B - Recording Preferences |
C - Record/Stop Button |
D - Fade-In/Out |
|
|
When you capture your voice-over, the audio is placed on a new audio track and is automatically synchronized with the video. Set your recording preferences as follows:
•click Device to select your audio device and input.
•click Profile to set the quality of the recorded audio.
•click Preferences to set a recording time limit or three second delay before recording begins to ensure you are ready to record. You can also set auto fades.
•select Mute all tracks when recording if you want CyberLink PowerDirector to mute all the other audio while you are recording the voice over.
•select  fade-in the voice over, or
  to add a fade-out effect.
To record a voice over, do this:
1.Set the recording volume level using the available volume level slider.
2.Click the  button.
3.Select where in your current project's timeline you want the recorded audio to be Recorded to. It can be recorded below a specified track, or over the audio on the currently selected track.
4.Click OK to begin recording. Record your voice over as you watch the video in the preview window.
5.Click to stop recording. The captured voice clip is placed on the specified audio track and imported into your project's media library.